 English
  Español
  Português
  Deutsch
  Français
  Italiano
  日本語
日本語  中文
中文  हिन्दी
  עברית
עברית  العربية
  한국어
한국어  Nederlands
  Polski
  Türkçe
  Українська
  Русский
  Magyar
  Română
  Български
  Čeština
  Ελληνικά
  Svenska
  Dansk
Dansk  Norsk
Norsk  Suomi
Suomi  Bahasa
  Tiếng Việt
  Tagalog
  ไทย
ไทย  Latviešu
  Lietuvių
  Eesti
Eesti  Slovenčina
  Slovenščina
  Hrvatski
  Македонски
  Қазақ
Қазақ  Azərbaycan
  Afrikaans
  বাংলা
বাংলা The Facility Inventory section allows you to view and manage tools, items, and consumable materials stored at each facility.
Here you can add items, adjust quantities, replenish stock, write off items, and transfer inventory to other facilities or technicians.
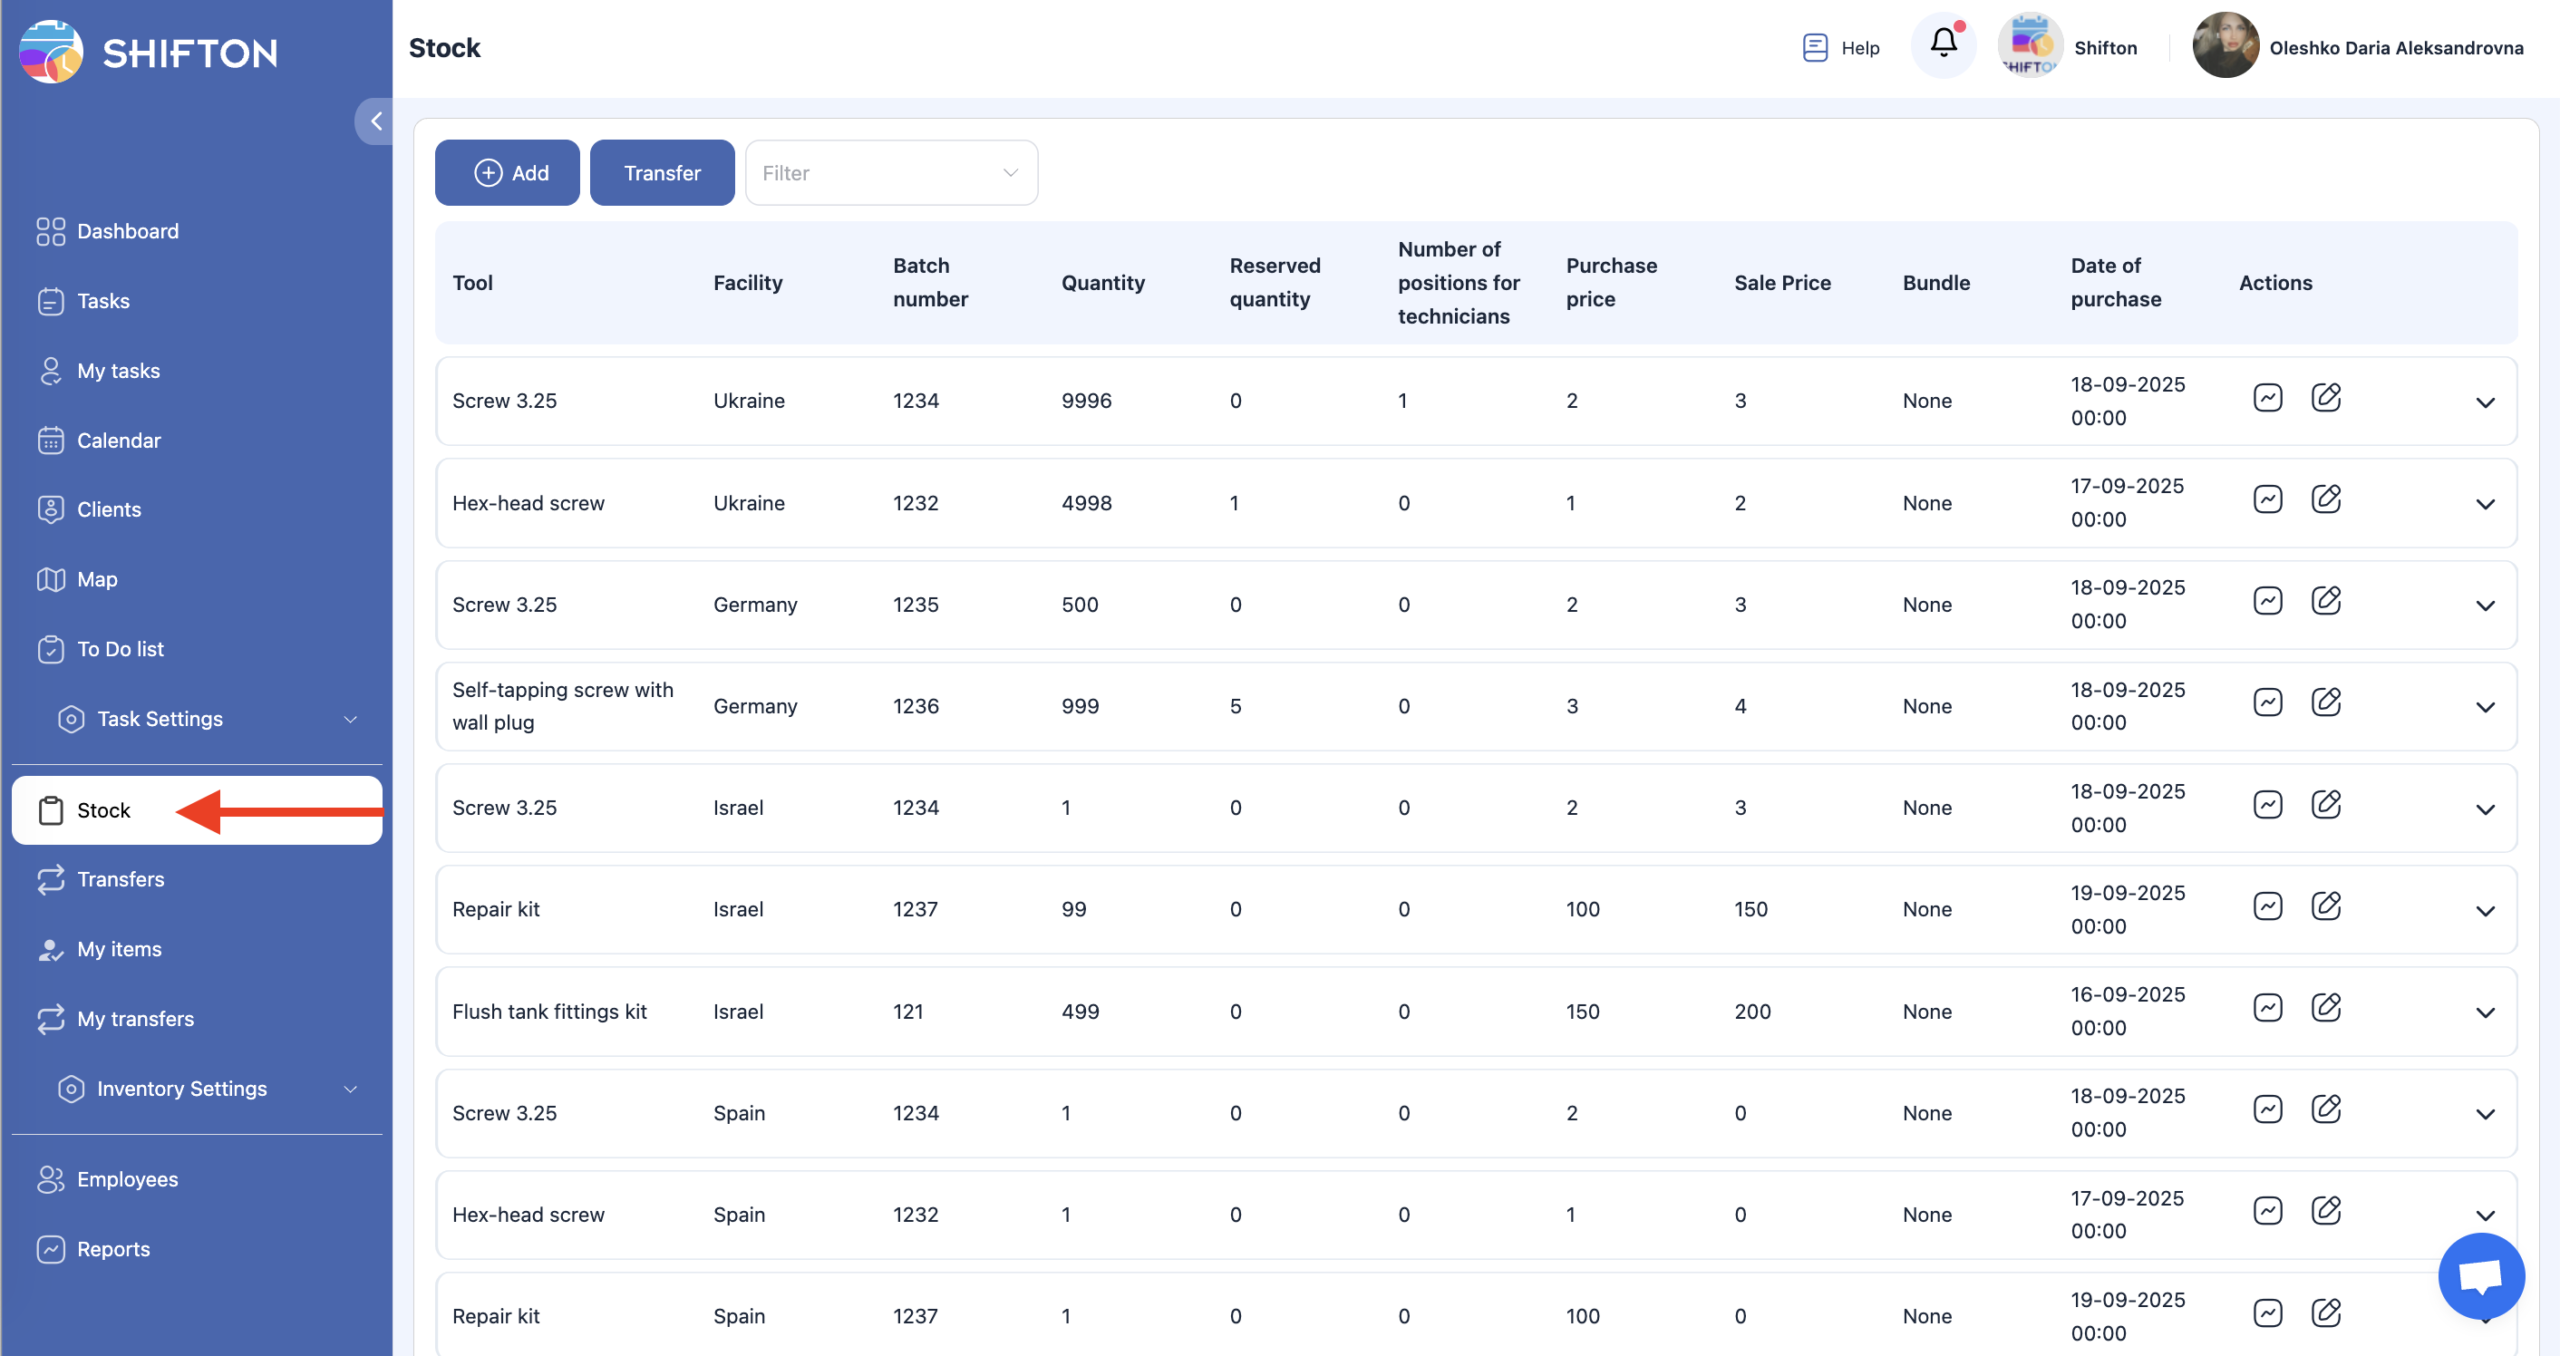
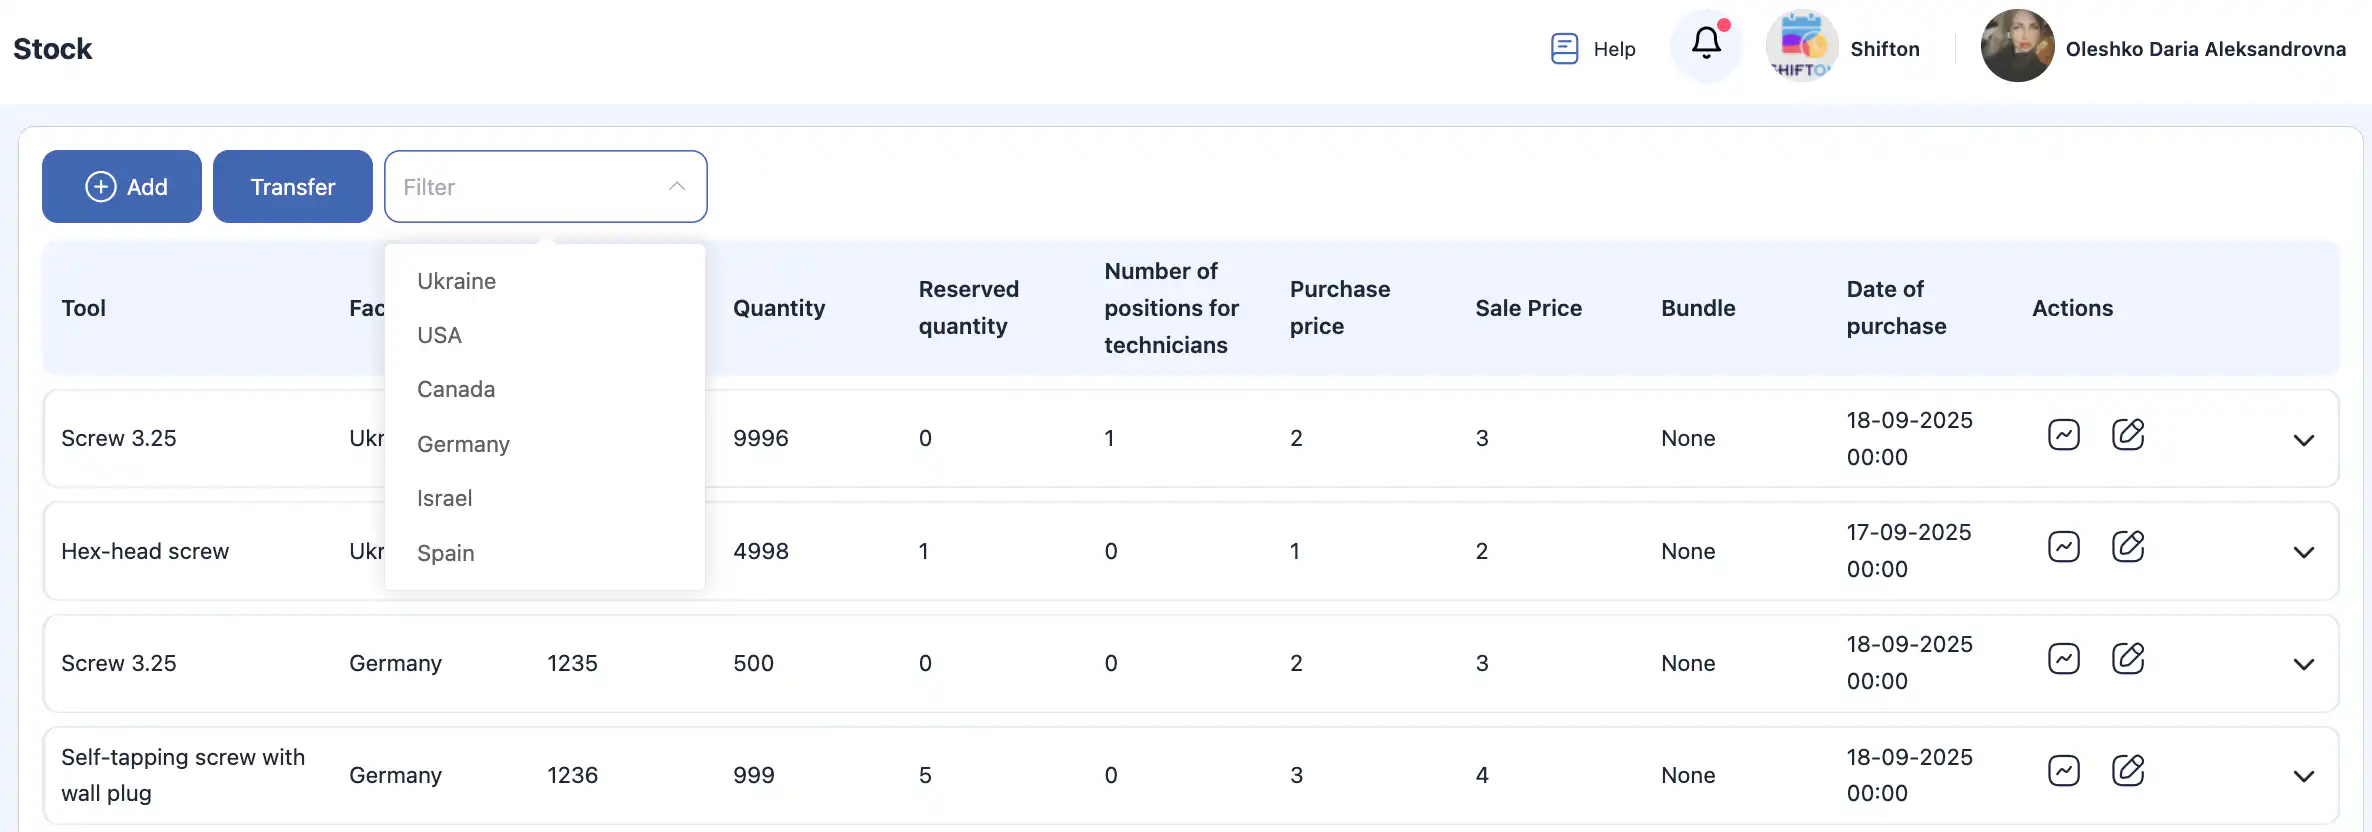
Viewing Inventory by Facility
At the top of the page, filters allow you to select one or several facilities.
-
Select one facility to view items stored there.
-
Select multiple facilities to compare or review distributed stock.
-
Leave the filter empty to view items across all facilities.
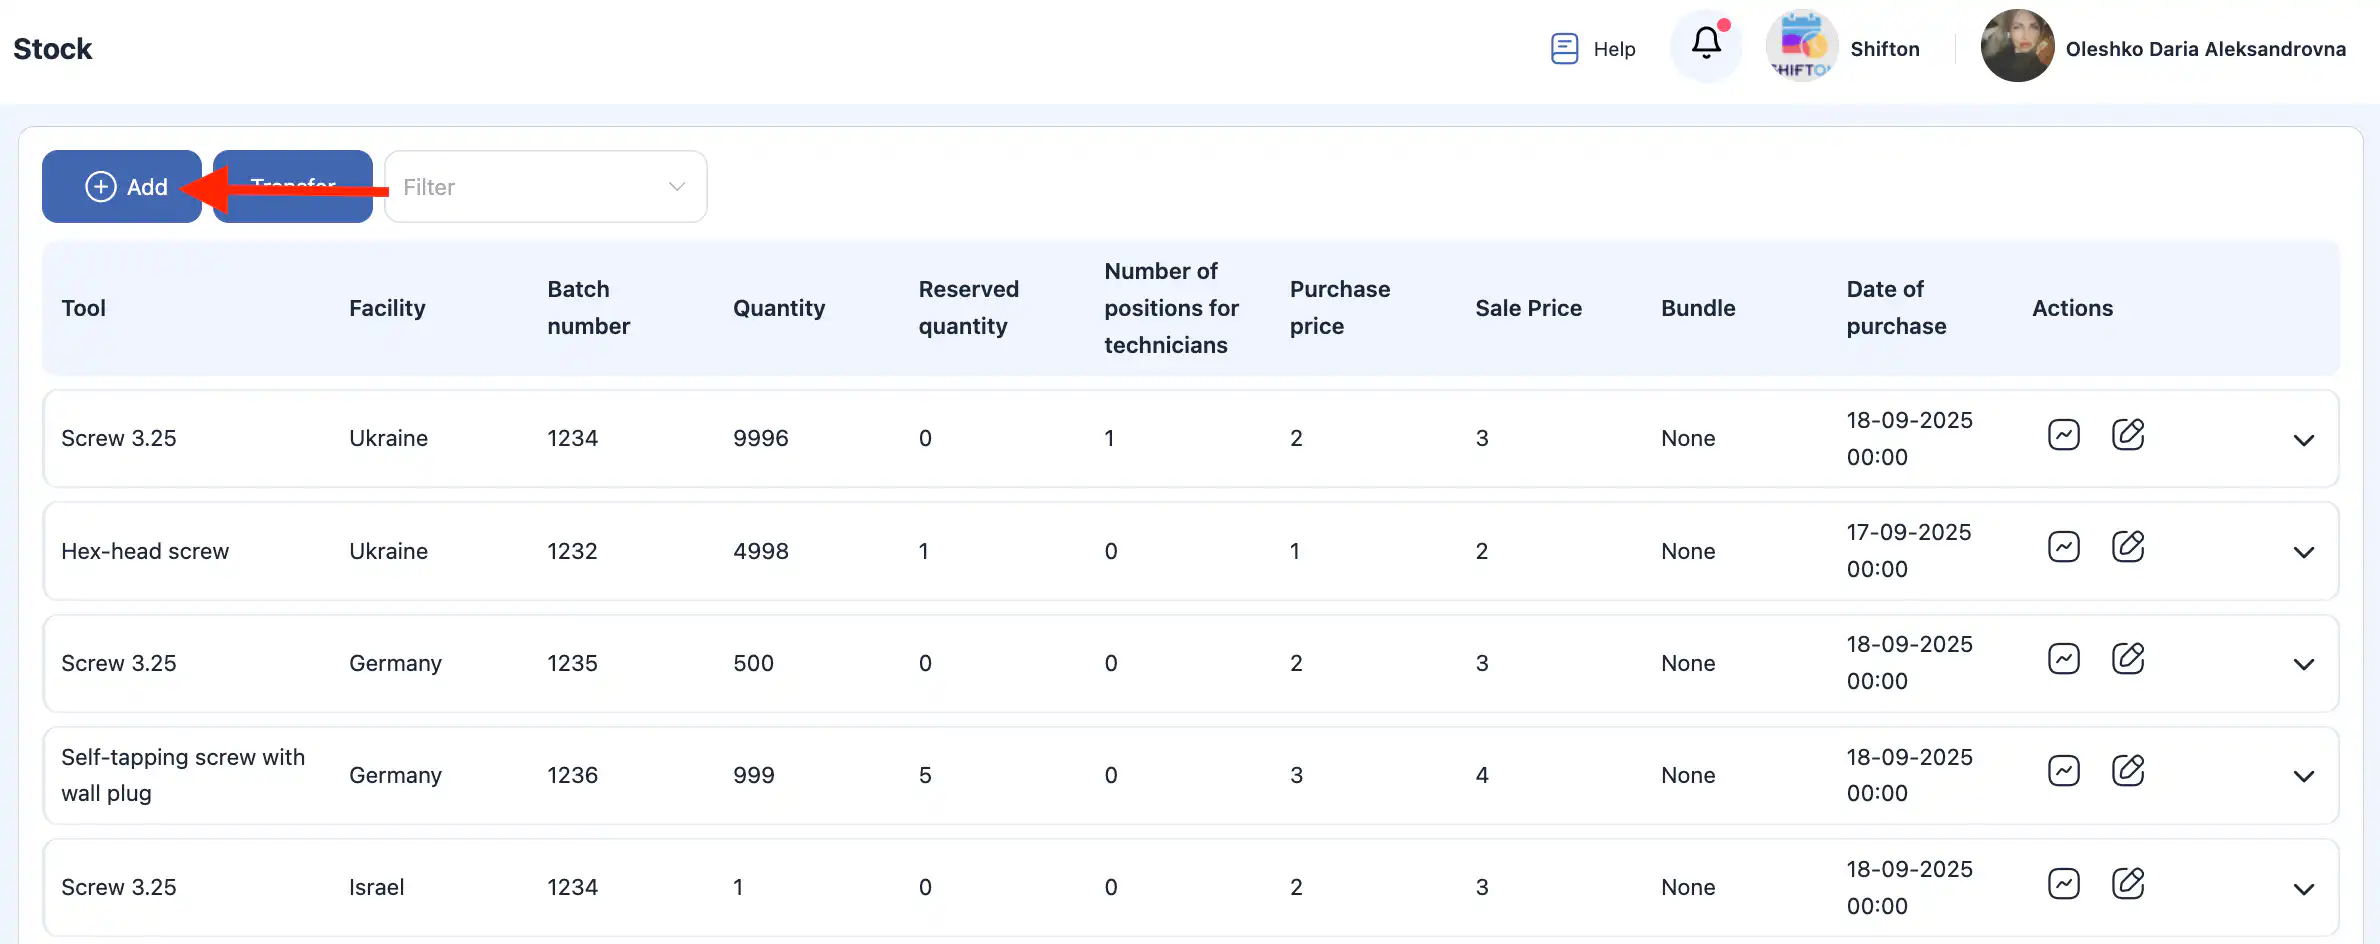
Adding Items to a Facility
-
Click the “+” button at the top of the page.
-
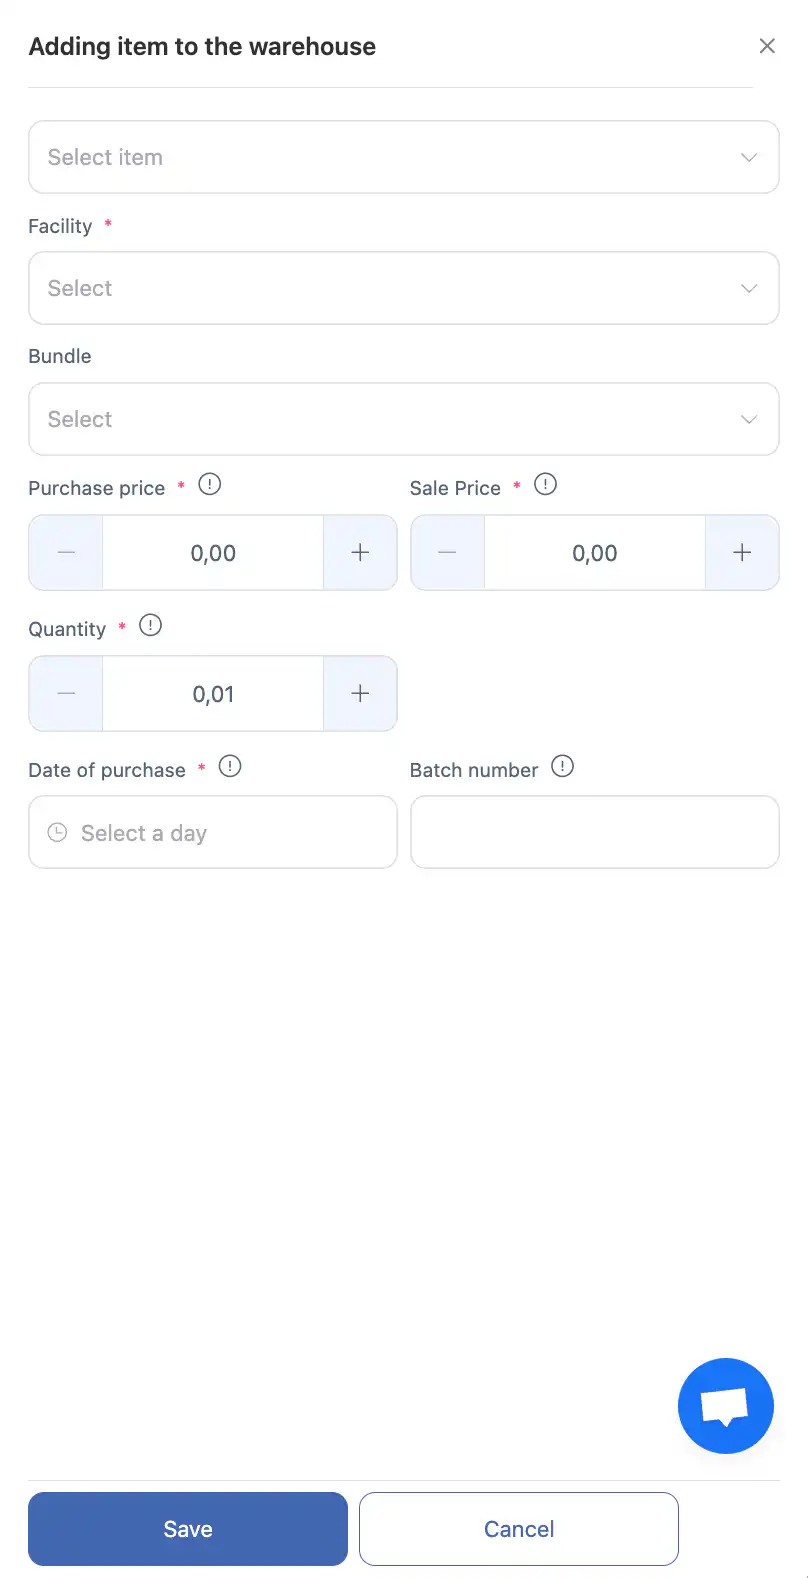
A side panel will open.
-
Choose the item you want to add.
-
Select the facility where the item should be added.
-
If needed, you can add a bundle of items — all items from the bundle will be added automatically.
-
Specify:
purchase price;
sale price;
quantity;
purchase date;
batch number (optional). -
Click “Save.”
-
To cancel the action, click “Cancel.”
After saving, the item will appear in the facility list with updated stock.
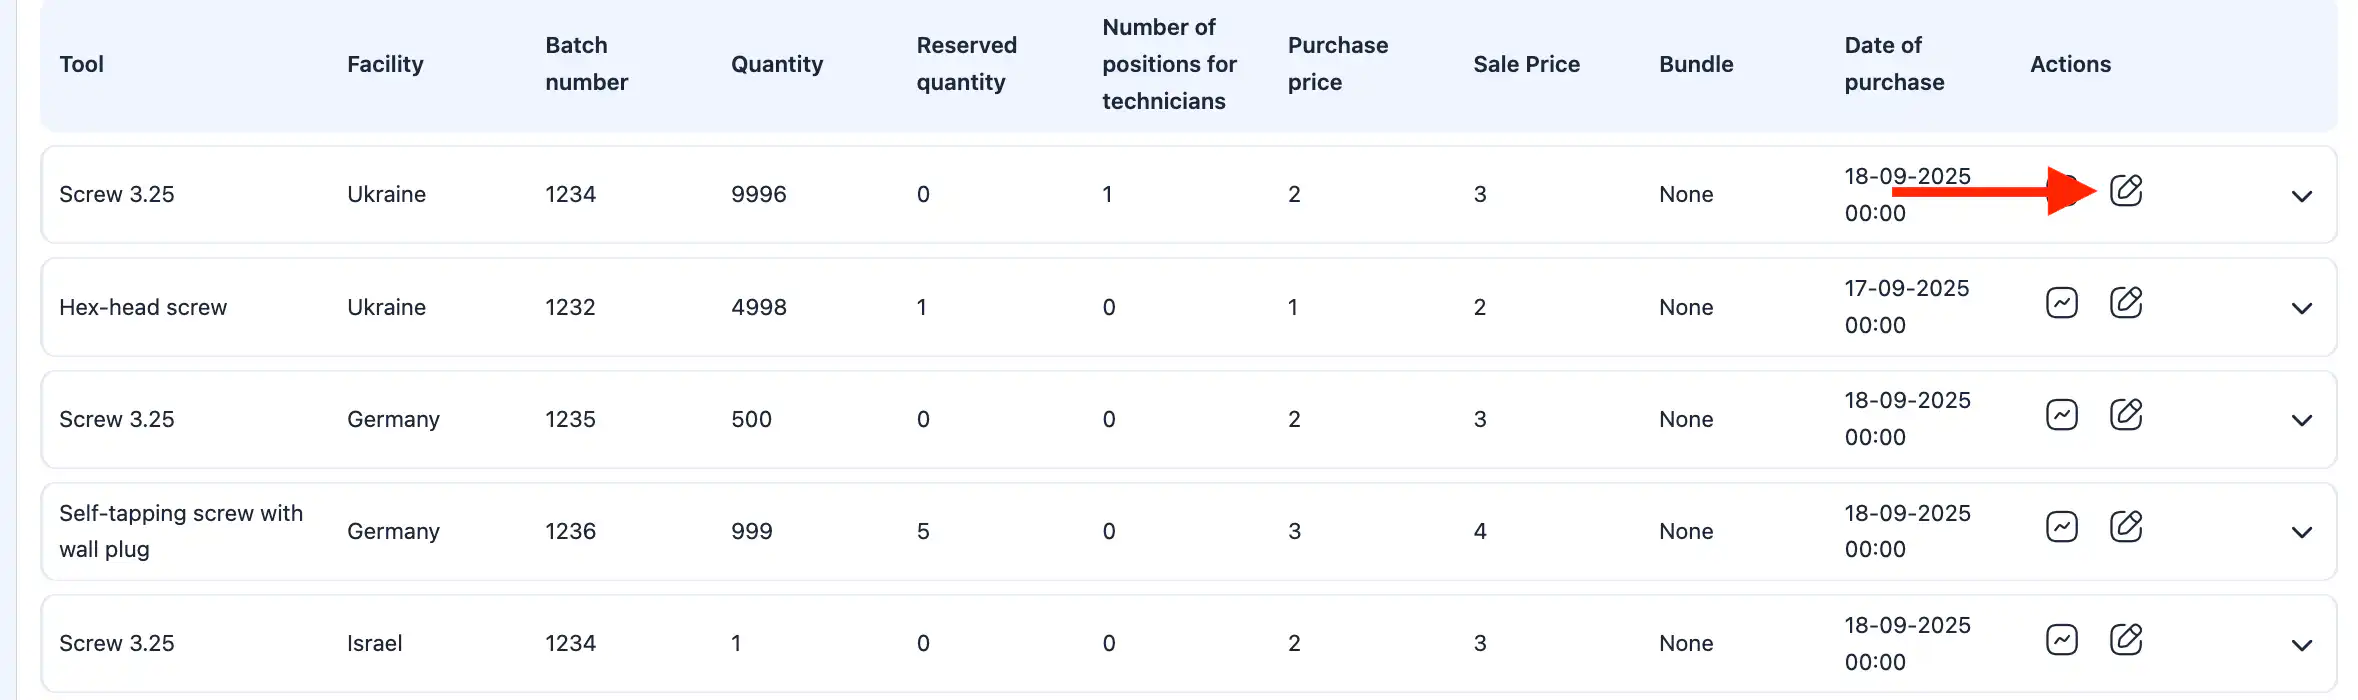
Adjusting Item Quantities
Adjustments are used to update the actual quantity of an item.
-
Find the item and click the pencil icon.
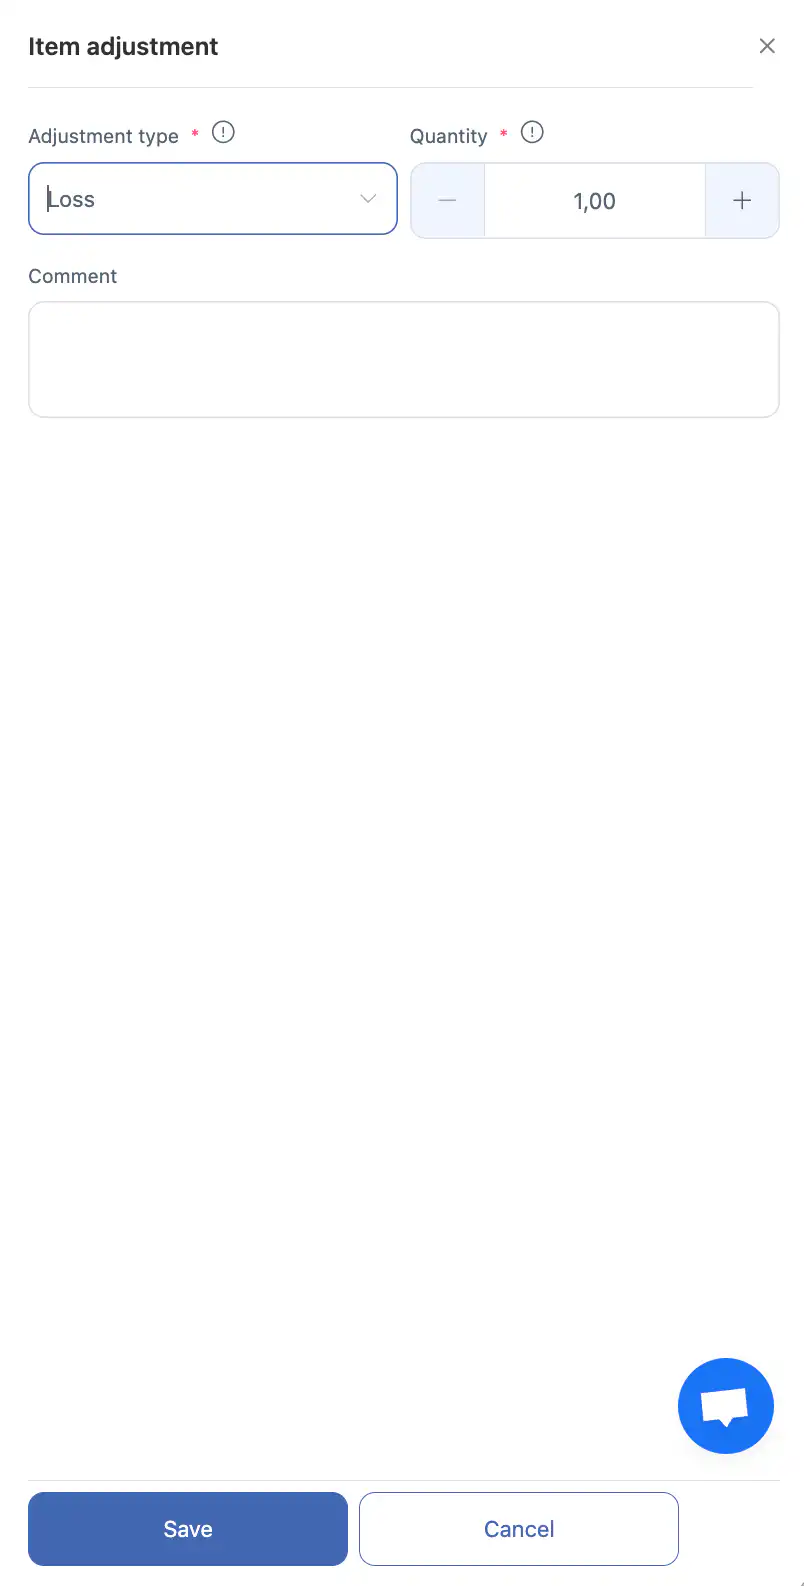
-
In the side panel, choose the adjustment type:
Lost — for missing items;
Found — for discovered extra stock;
Written off — for damaged or unusable items;
Restock — for incoming stock. -
Enter the quantity to adjust.
-
Add a comment if needed (reason for loss, source of replenishment, etc.).
-
Click “Save.”
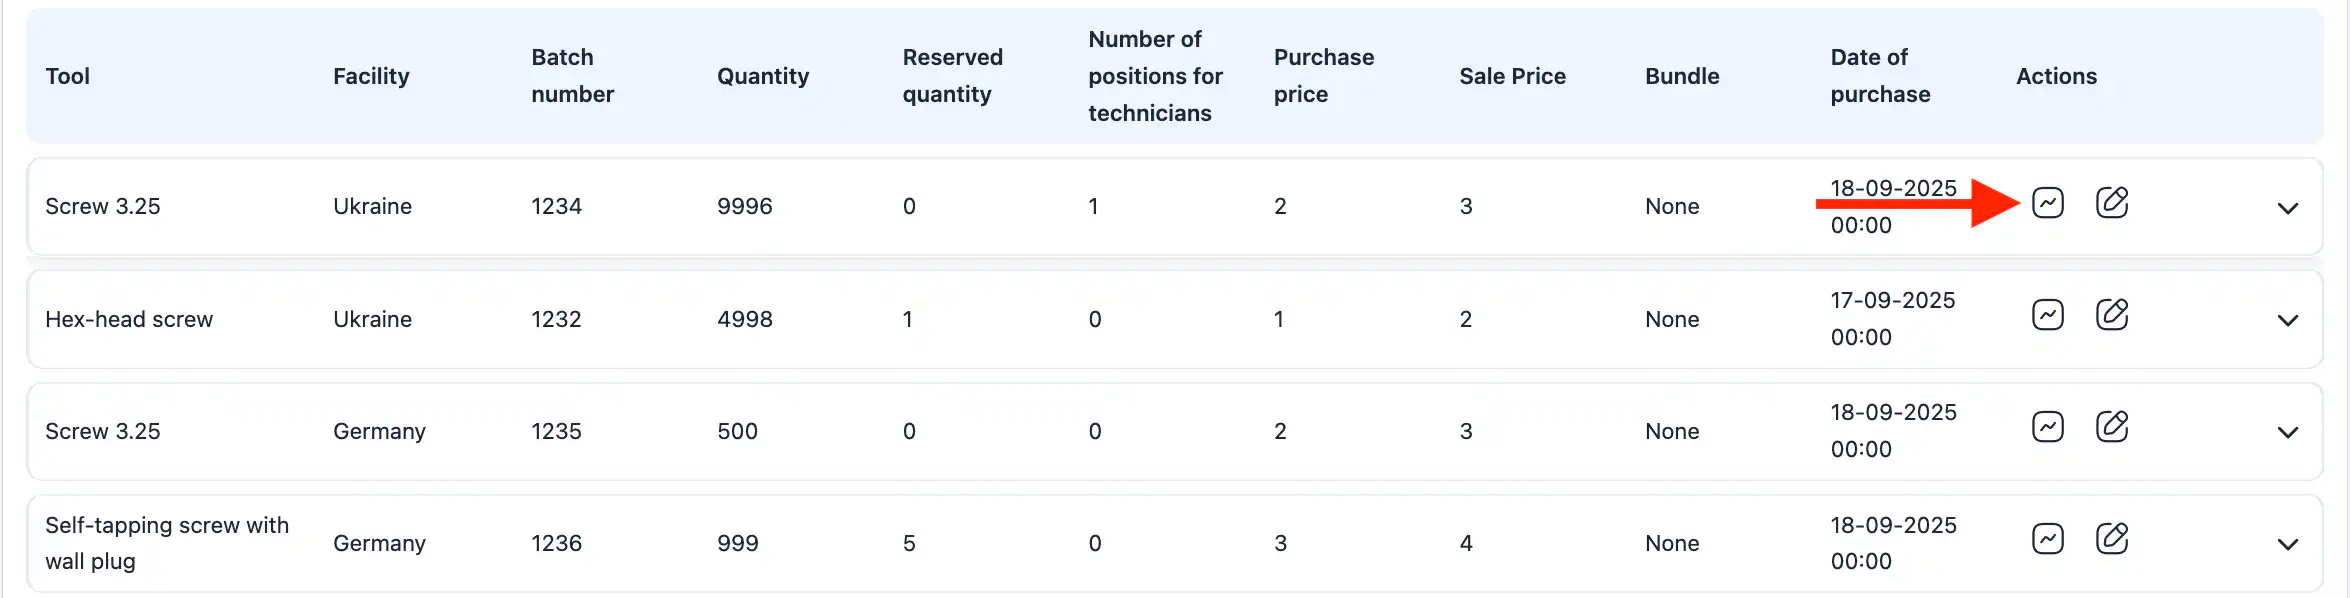
Transferring Items
Transferring a Single Item
-
Click the transfer icon (square with curved line) next to the item.
-
In the side panel, choose the transfer destination:
technician;
facility. -
Enter the quantity to transfer.
-
Add a comment if needed.
-
Confirm the transfer.
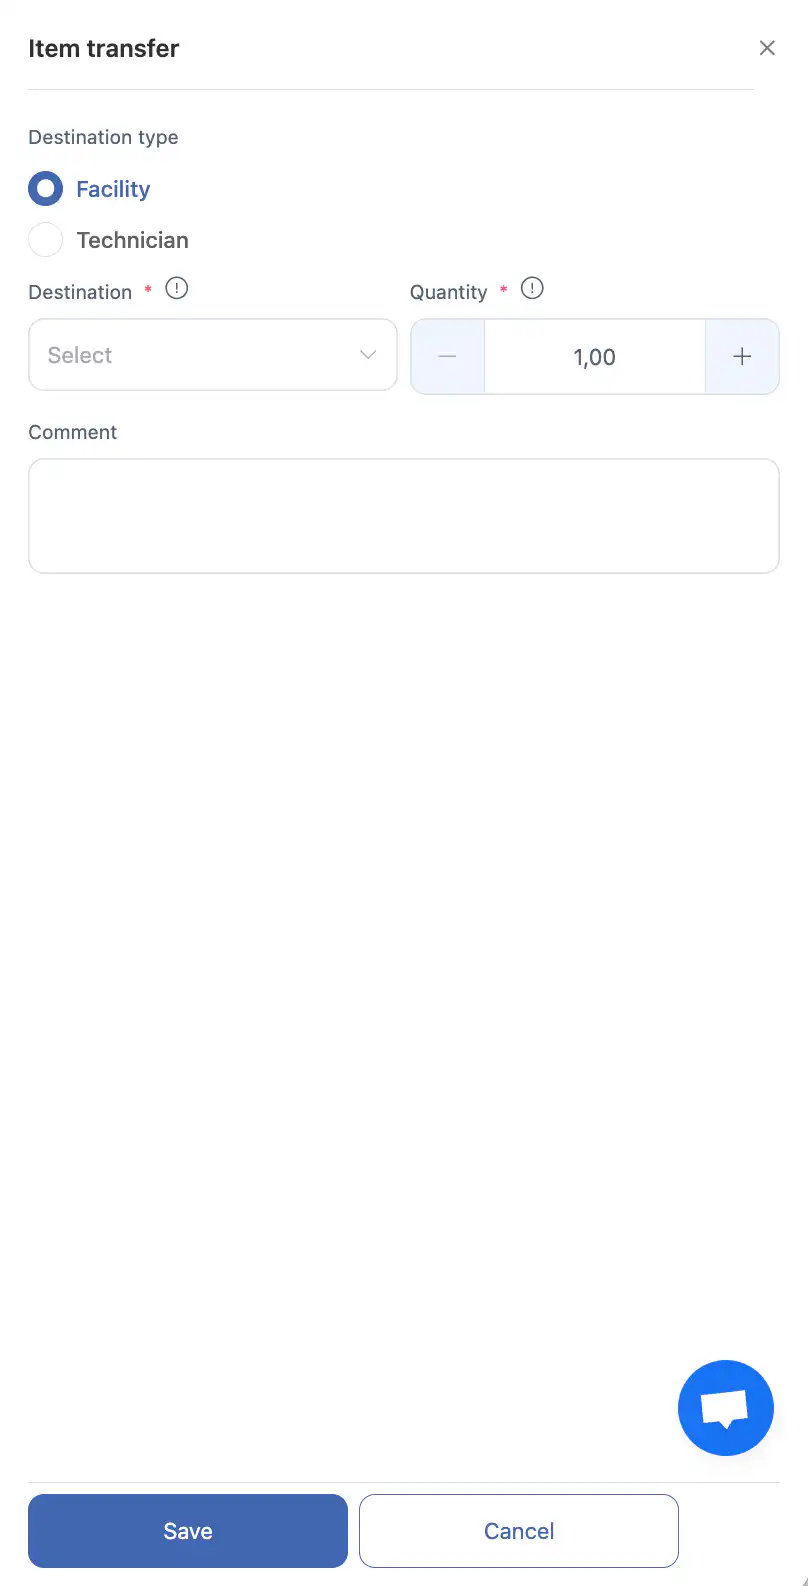
The item will be deducted from the current facility and added to the selected destination.
Mass Transfer of Multiple Items
-
Click the “Transfer” button at the top of the page.

-
In the side panel, choose the destination (technician or facility).
-
Select an item and enter the quantity.
-
Click “+” to add additional items to the transfer list.
-
After completing the list, click “Save.”
-
To cancel, click “Cancel.”
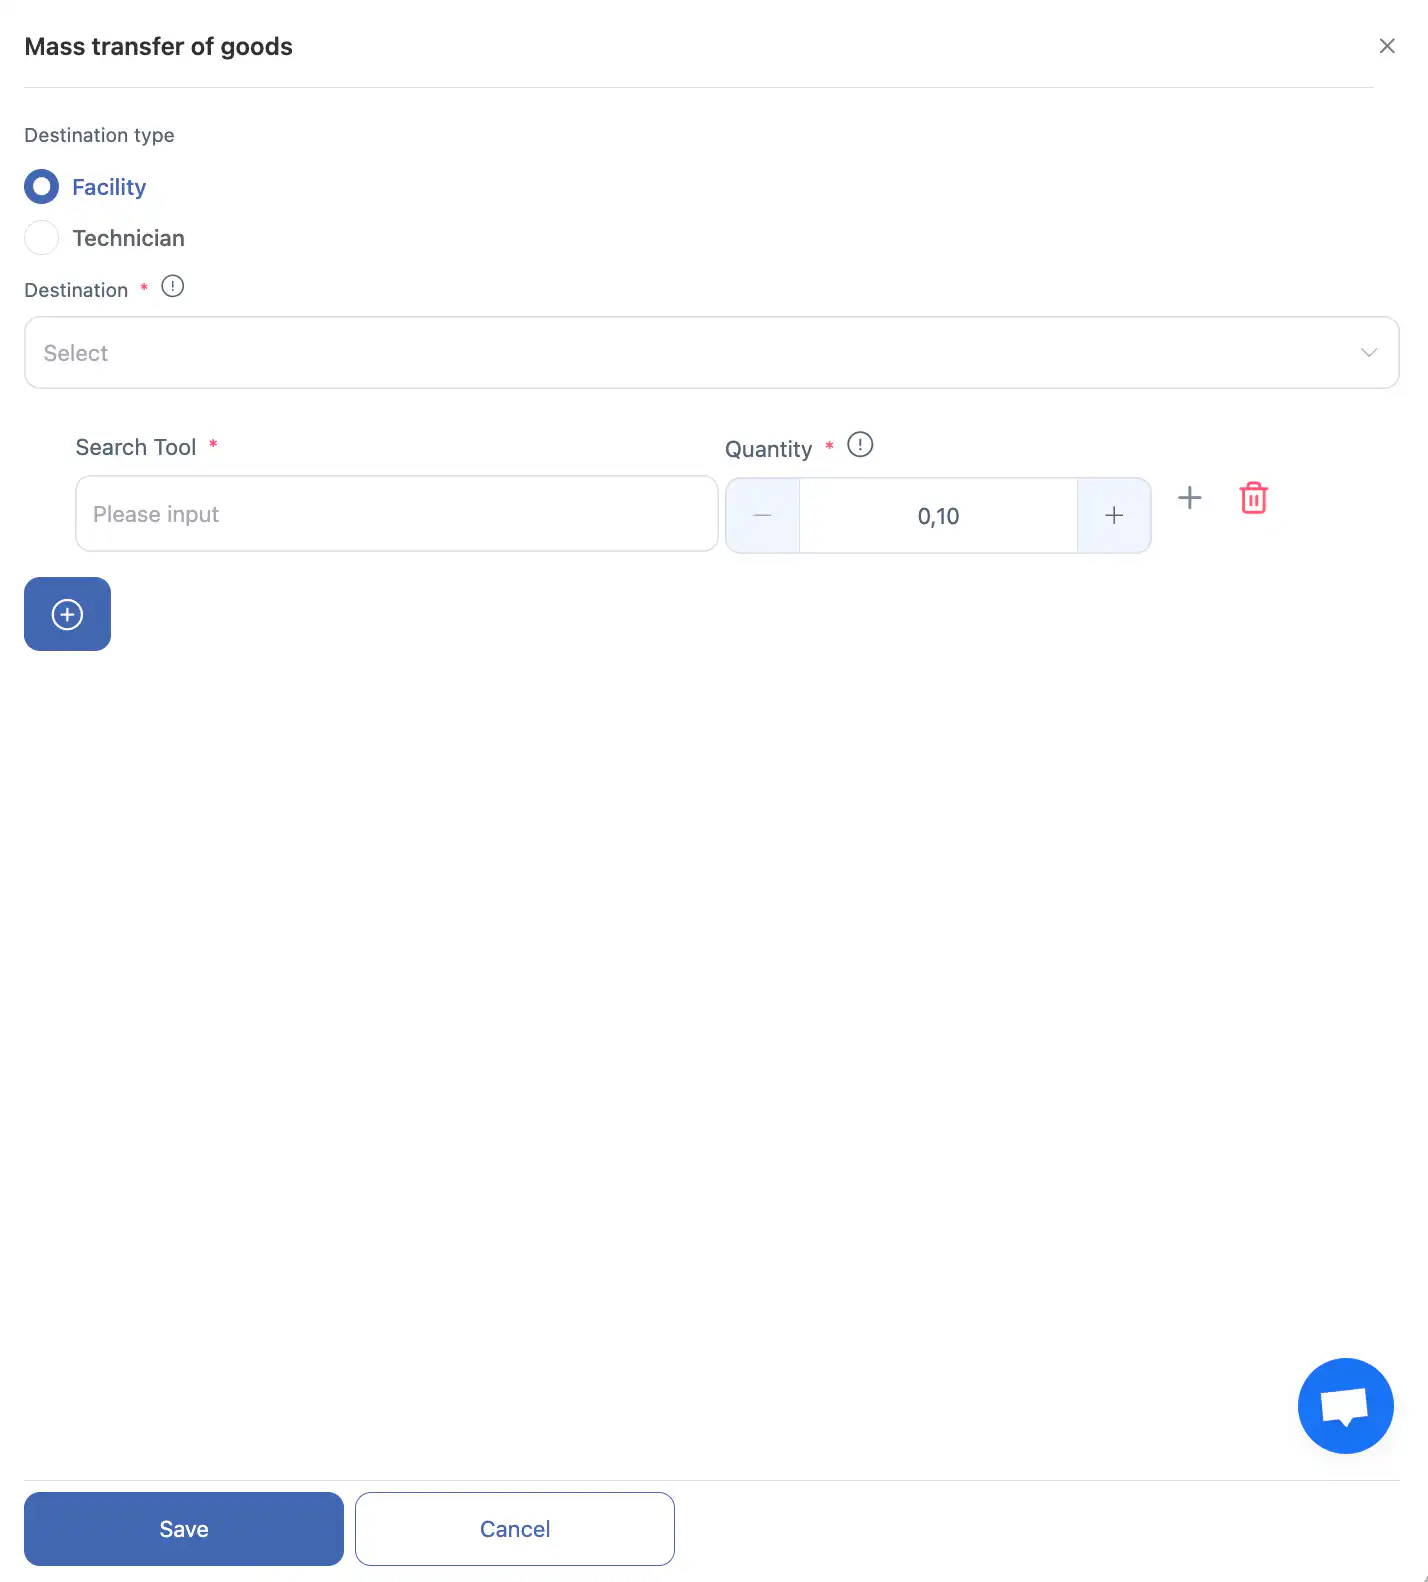
Mass transfer is ideal for preparing technician kits or moving large quantities between facilities.
Movement History and Technician Stock Overview
Each item includes detailed movement statistics.
To open the history:
-
Click the arrow icon next to the item.
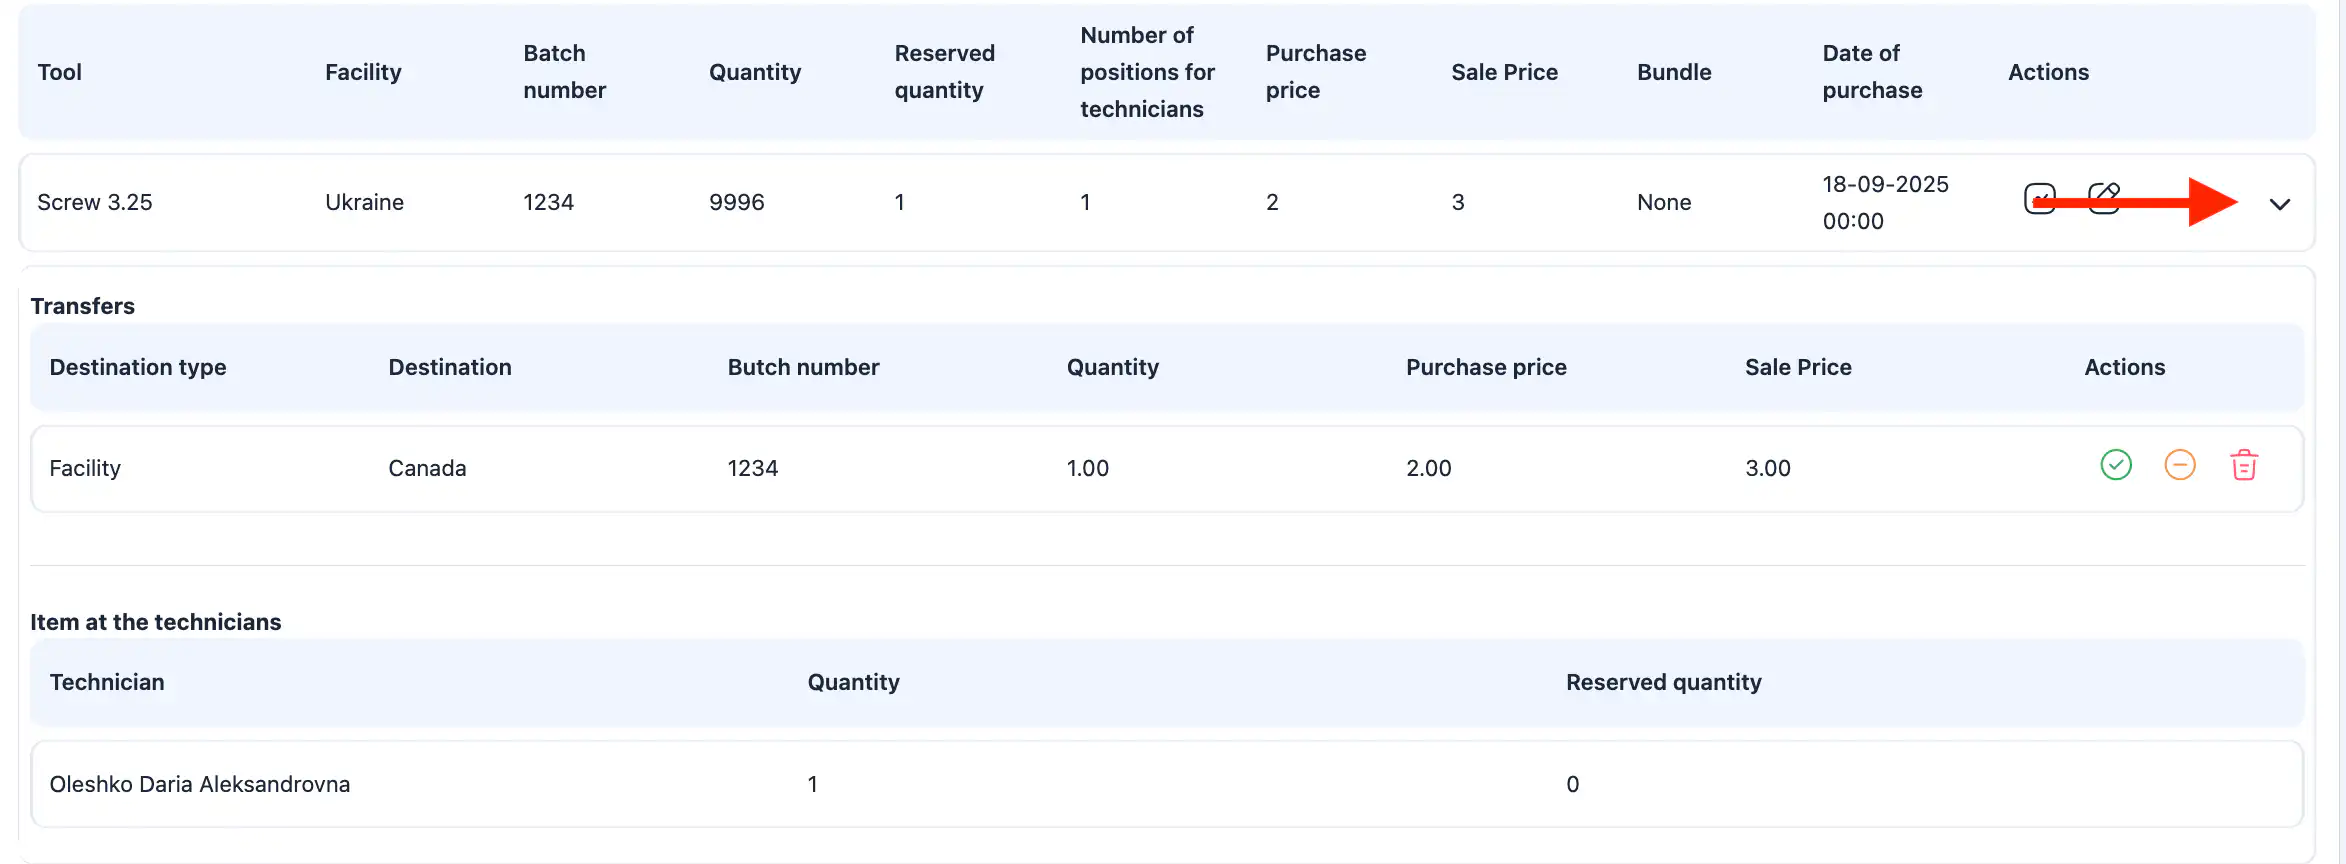
-
The panel will display:
all movements between facilities;
transfers to technicians;
write-offs and adjustments;
returns;
dates and the responsible users for each operation.
You can also see:
-
current quantity held by each technician;
-
reserved quantity;
-
facility stock levels.
Additionally, you can remove an item from a technician’s inventory if it was assigned by mistake.
Frequently Asked Questions (FAQ)
Q: What is the Facility Inventory Overview?
A: The Facility Inventory Overview lets you view and manage tools, items, and consumable materials stored at each facility. You can add items, adjust quantities, replenish stock, write off items, and transfer inventory to other facilities or technicians.
Q: Where do I find facility inventory information?
A: In the Inventory module, open the Facility Inventory section to see stock levels and operations for items across facilities.
Q: How can I view inventory for a specific facility?
A: Use the filters at the top of the page to select one or more facilities. Selecting a single facility shows only its inventory; selecting multiple lets you compare stock across them.
Q: How do I add items to a facility?
A: Click the “+” button, choose the item and facility, enter purchase price, sale price, quantity, purchase date, and batch number (optional), then click “Save.”
Q: What if I make a mistake when adding an item?
A: You can cancel the action before saving by clicking “Cancel.” Once saved, the item will appear in inventory.
Q: What are quantity adjustments and when should I use them?
A: Adjustments update the actual count of an item. You can mark stock as lost, found (extra stock), written off (damaged), or restocked. Enter the adjustment type and quantity, add a comment if needed, and click “Save.”
Q: How do I transfer items from one facility to another or to a technician?
A: For a single item, click the transfer icon next to it, choose the destination (facility or technician), enter quantity and comment (optional), and confirm the transfer.
Q: Can I transfer multiple items at once?
A: Yes. Click the “Transfer” button at the top, choose the destination, add items and quantities to the list, then click “Save.” Mass transfers are useful for preparing technician kits.
Q: How do I see the movement history of an item?
A: Click the arrow icon next to an item to open its history panel. You’ll see all movements between facilities, transfers to technicians, write-offs, adjustments, returns, dates, and the users responsible.
Q: Can I view a technician’s current stock from here?
A: Yes. The history and overview panel shows each technician’s current quantity and reserved amount for the selected item.
Q: What if an item was mistakenly assigned to a technician?
A: You can use the overview panel to remove the item from a technician’s inventory if it was assigned by mistake.