 English
  Español
  Português
  Deutsch
  Français
  Italiano
  日本語
日本語  中文
中文  हिन्दी
  עברית
עברית  العربية
  한국어
한국어  Nederlands
  Polski
  Türkçe
  Українська
  Русский
  Magyar
  Română
  Български
  Čeština
  Ελληνικά
  Svenska
  Dansk
Dansk  Norsk
Norsk  Suomi
Suomi  Bahasa
  Tiếng Việt
  Tagalog
  ไทย
ไทย  Latviešu
  Lietuvių
  Eesti
Eesti  Slovenčina
  Slovenščina
  Hrvatski
  Македонски
  Қазақ
Қазақ  Azərbaycan
  Afrikaans
  বাংলা
বাংলা Tasks are the core module in Field Service mode and cannot be disabled.
Tasks allow you to assign work to one or multiple employees, with an attached checklist to complete during task execution. Tasks are central to Field Service operations and are used for all types of assignments, planning, and tracking work.
Note: Tasks are essential; everything in Field Service revolves around them. Understanding tasks fully is critical to using the system effectively.
Pages Where You Can Create a Task
Tasks can be created from multiple places in the system, depending on workflow and preference.
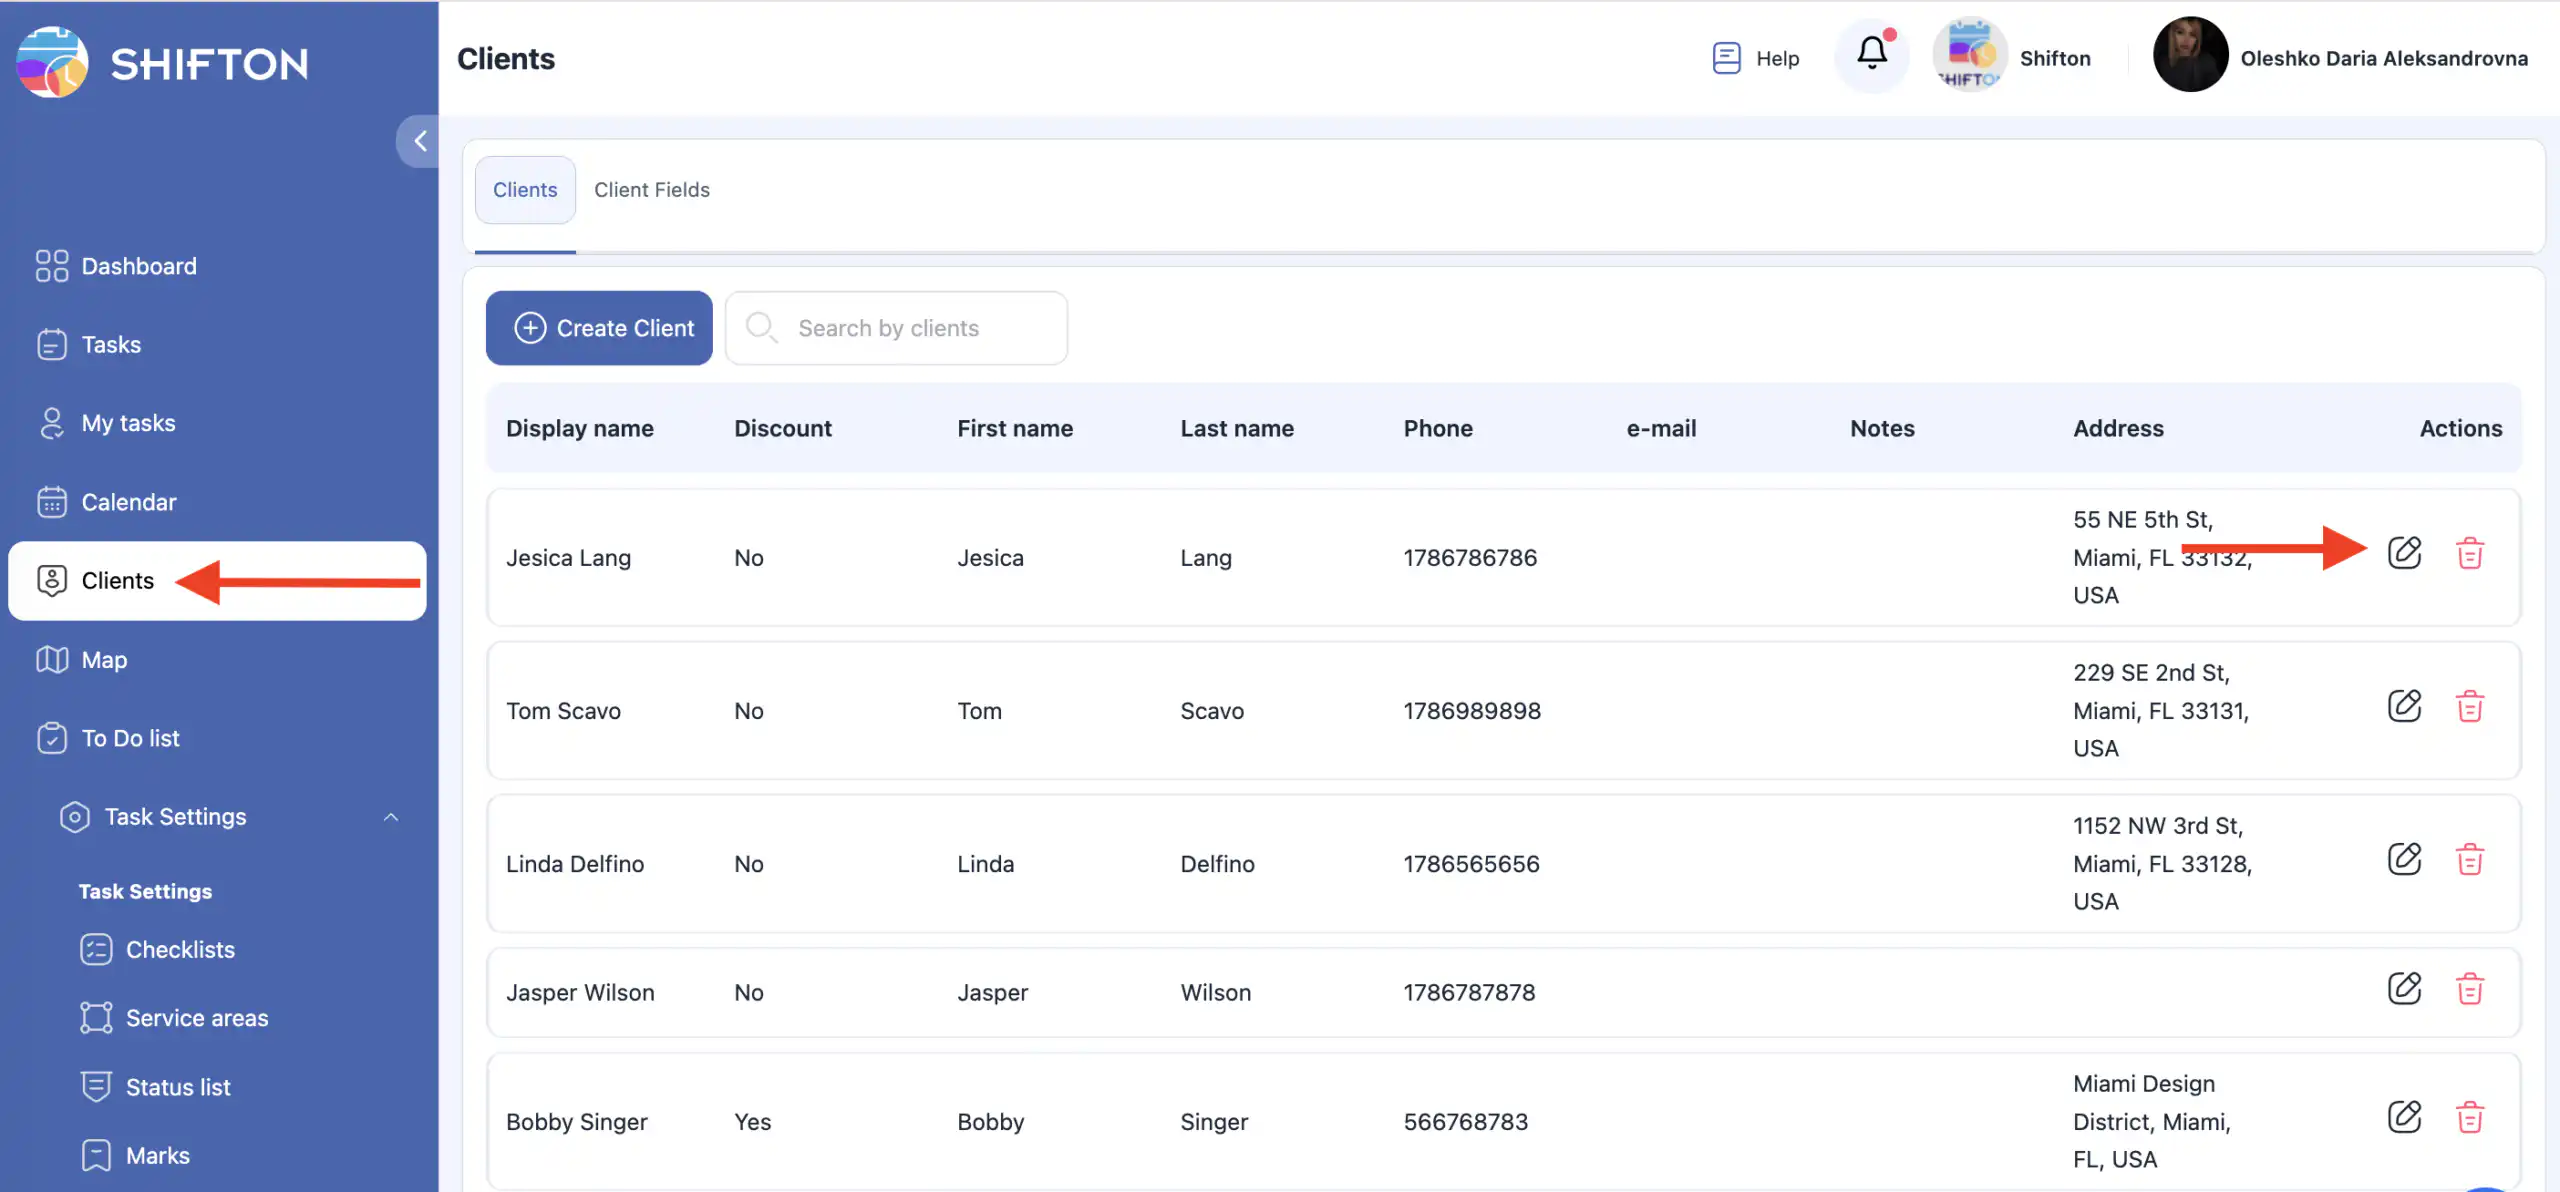
1. Clients Page
-
Navigate to the Clients page.
-
Locate the desired client in the list.
-
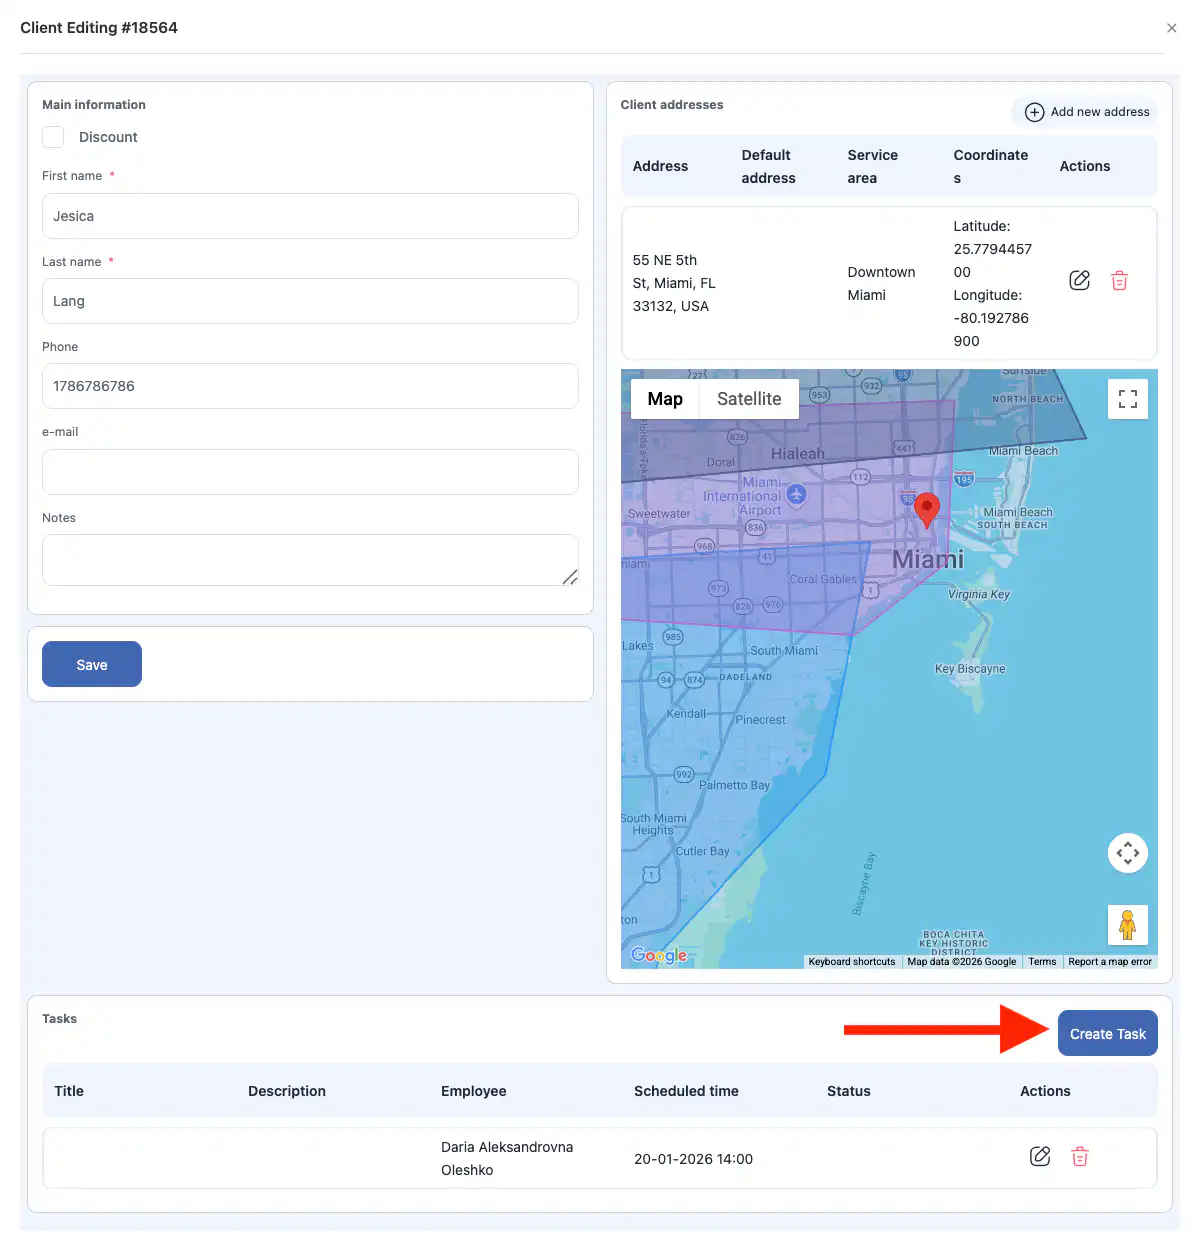
Click the pencil icon next to the client name to open the client profile side panel.
-
Scroll down in the panel and click Create Task.
Important details:
-
If a client has multiple addresses, you must select one specific address for the task.
-
When creating a task via the Clients page, the client is automatically added. You do not need to select a client manually.
-
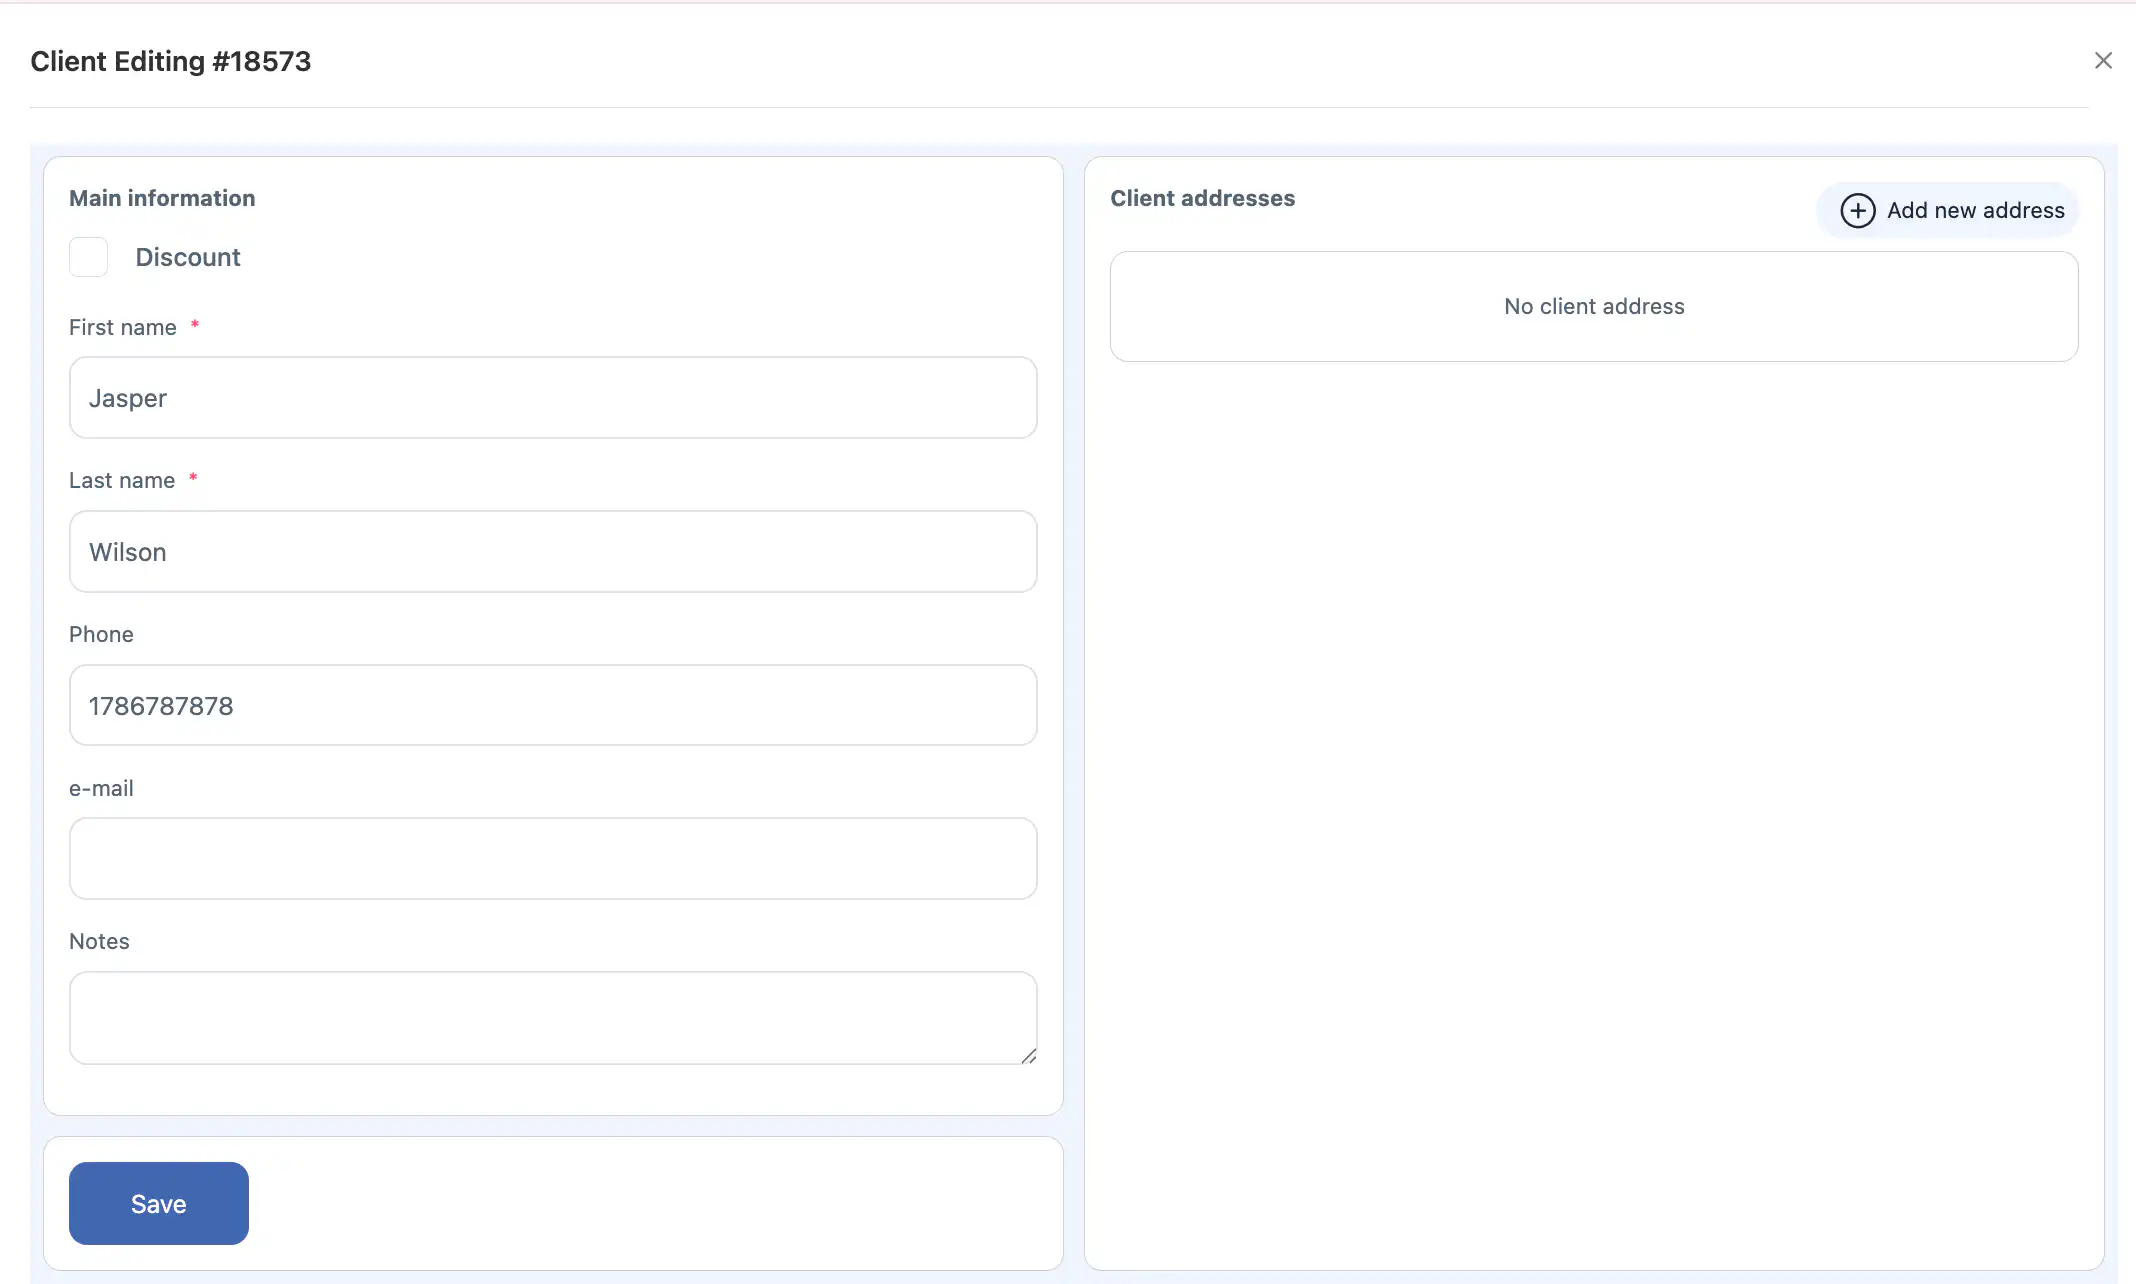
If any client details need editing (e.g., name, contact info, address), click the pencil icon, update the information in the side panel, and click Save.
-
To create a new client, click the + icon in the client section, fill in the necessary fields configured for your company, and click Save.
Tip: Always double-check the selected client and address, especially if the client has multiple addresses, to avoid assigning the task incorrectly.
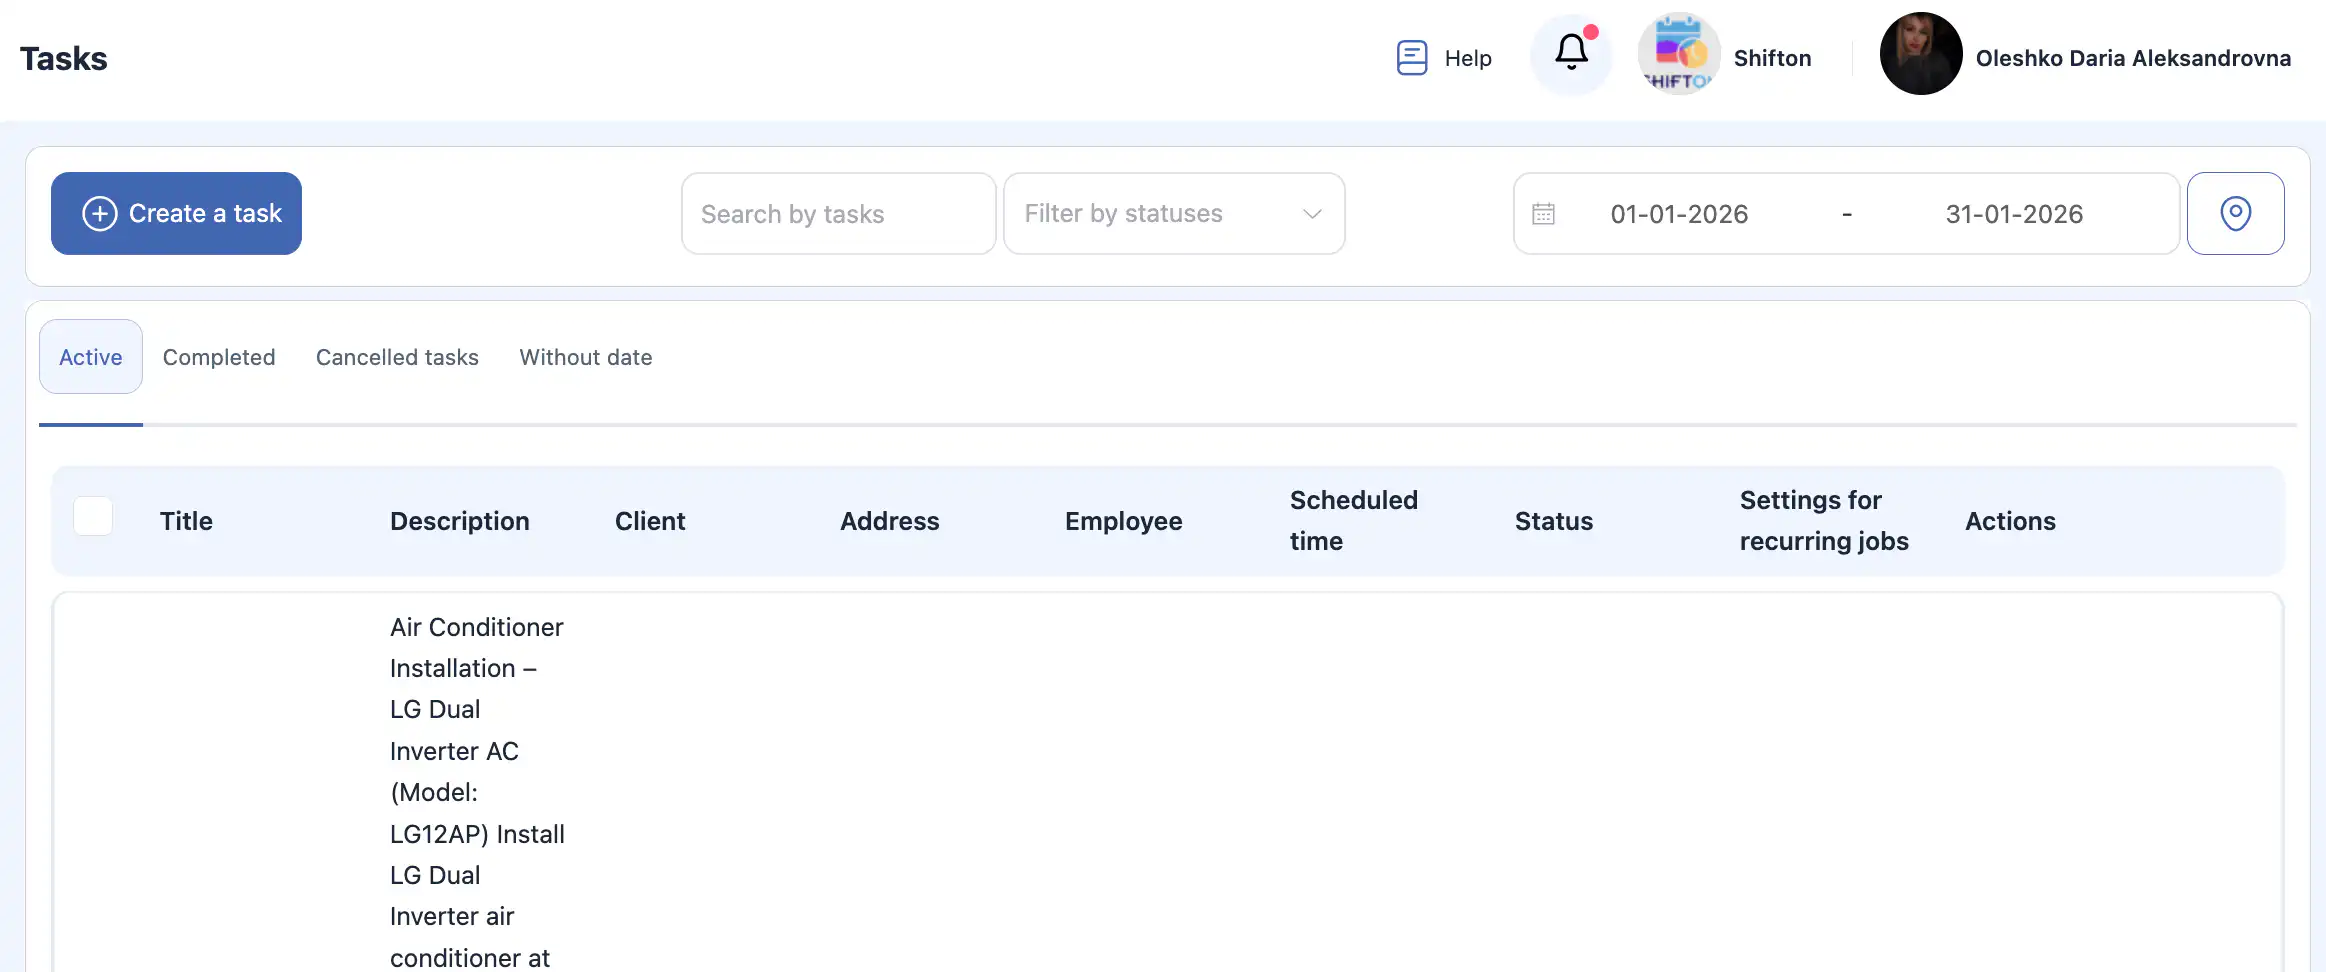
2. Tasks Page
The Tasks page provides a detailed overview and management tools for all tasks.
You can:
-
View tasks as a list.
-
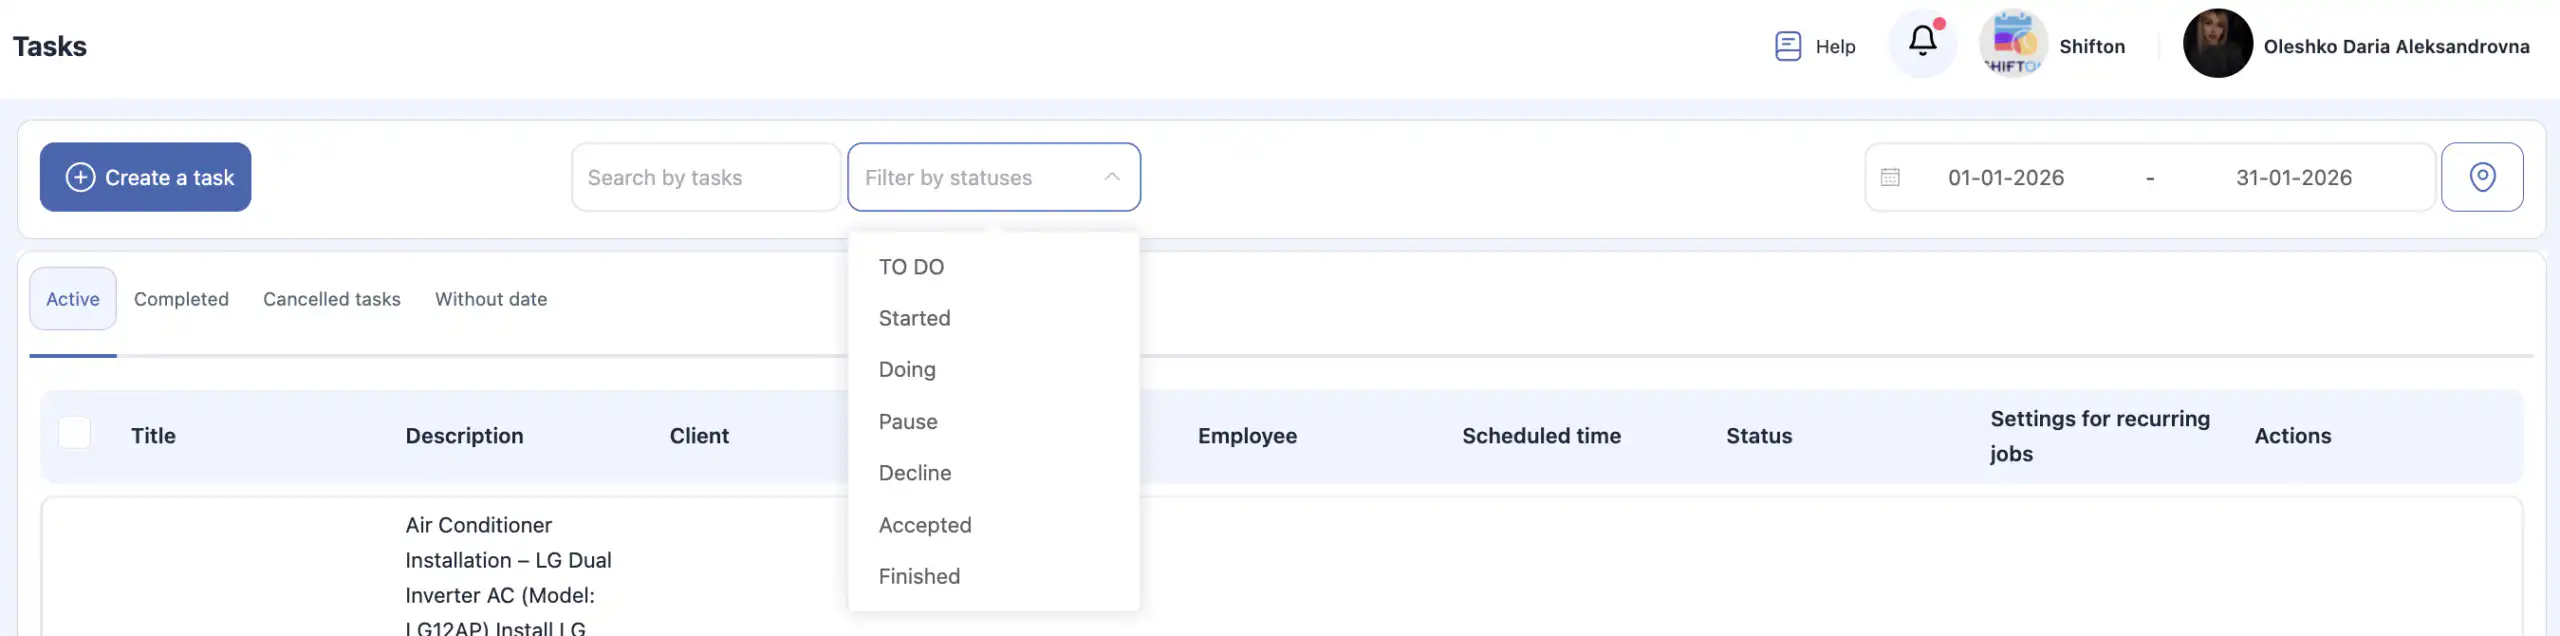
Filter tasks by status: Active, Completed, Canceled, and Without Date.
-
Search tasks using keywords.
-
Note: Only fields enabled for search during task field creation can be searched.
-
-
Filter tasks by one or more statuses.
-
Select a date range to display tasks.

-
Display filtered and sorted tasks on a map.
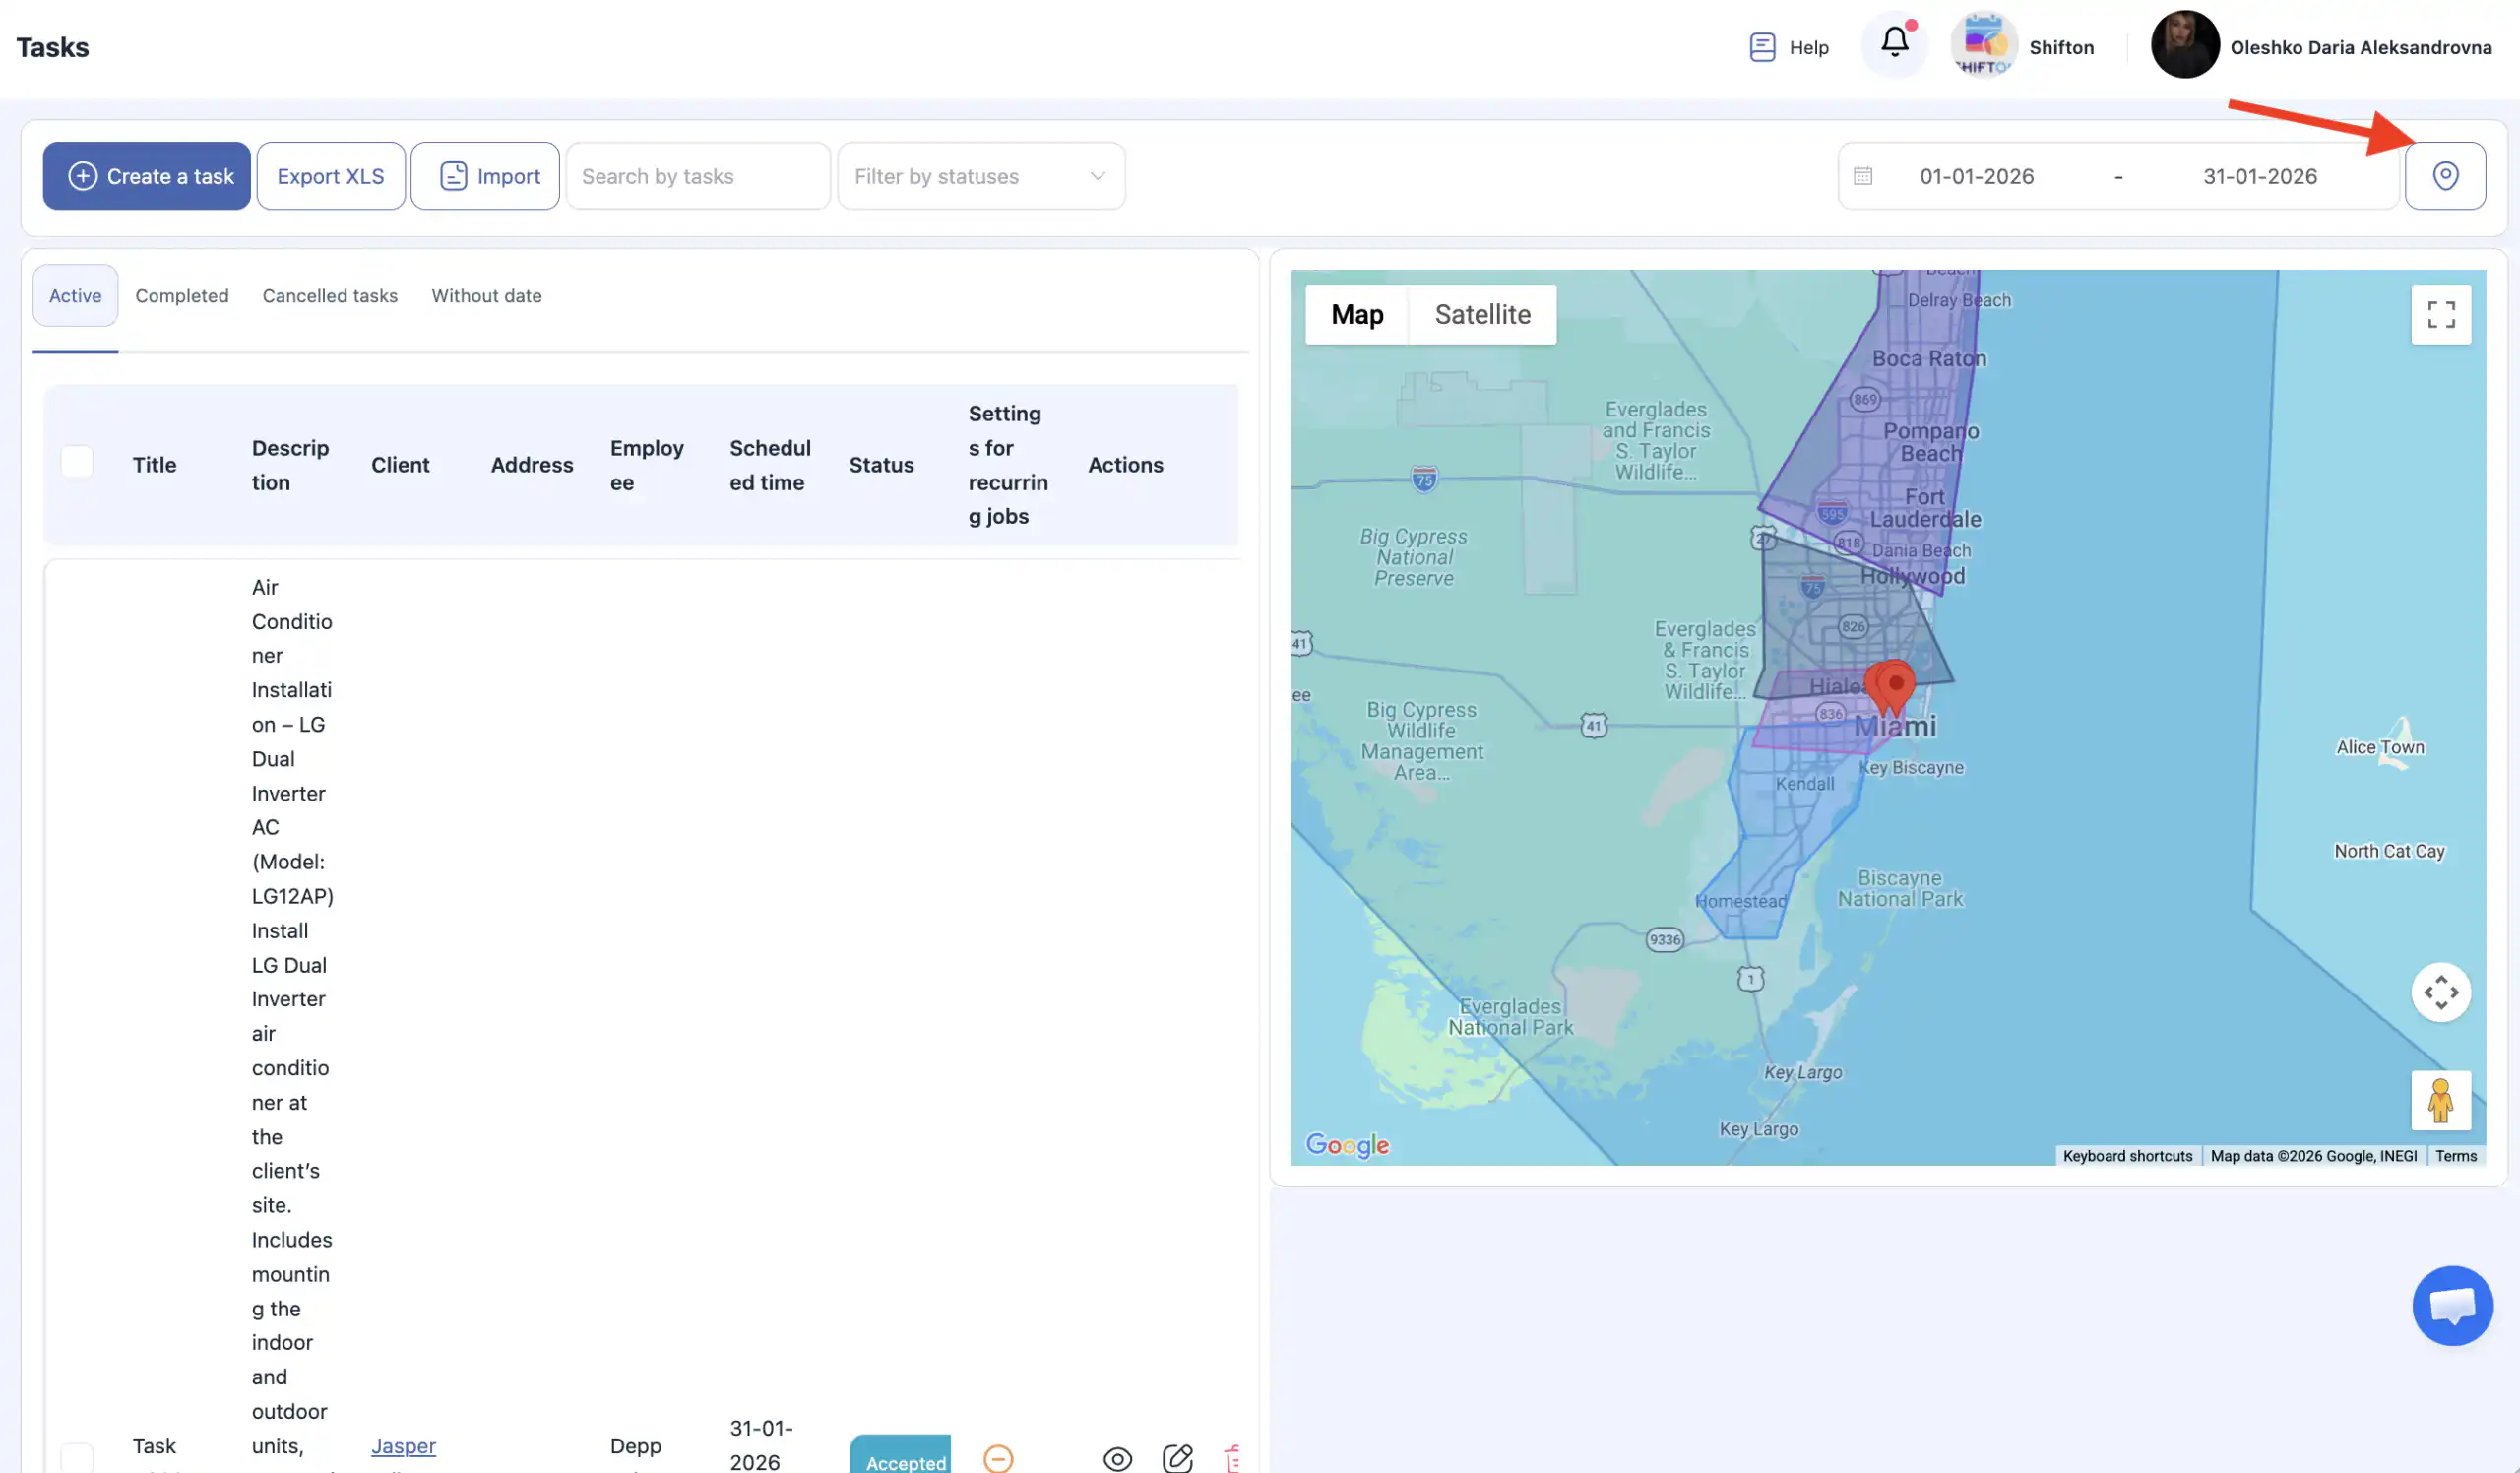
Displayed task fields include:
-
Title and Description – standard fields. If customizations were made (added/removed/reordered fields), the display reflects those settings.
-
Client – the client linked to the task.
-
Address – the client’s address associated with the task.
-
Employee – assigned employee(s).
-
Scheduled time – planned start time.
-
Status – current task status.
-
Completed – shown only for completed tasks; displays the completion time by the employee.
-
Settings for recurring jobs – orange circle with stripe = non-recurring task; green circle with checkmark = recurring task.
-
Actions – options to delete the task.
Tip: Use filters and sorting to manage large numbers of tasks efficiently.
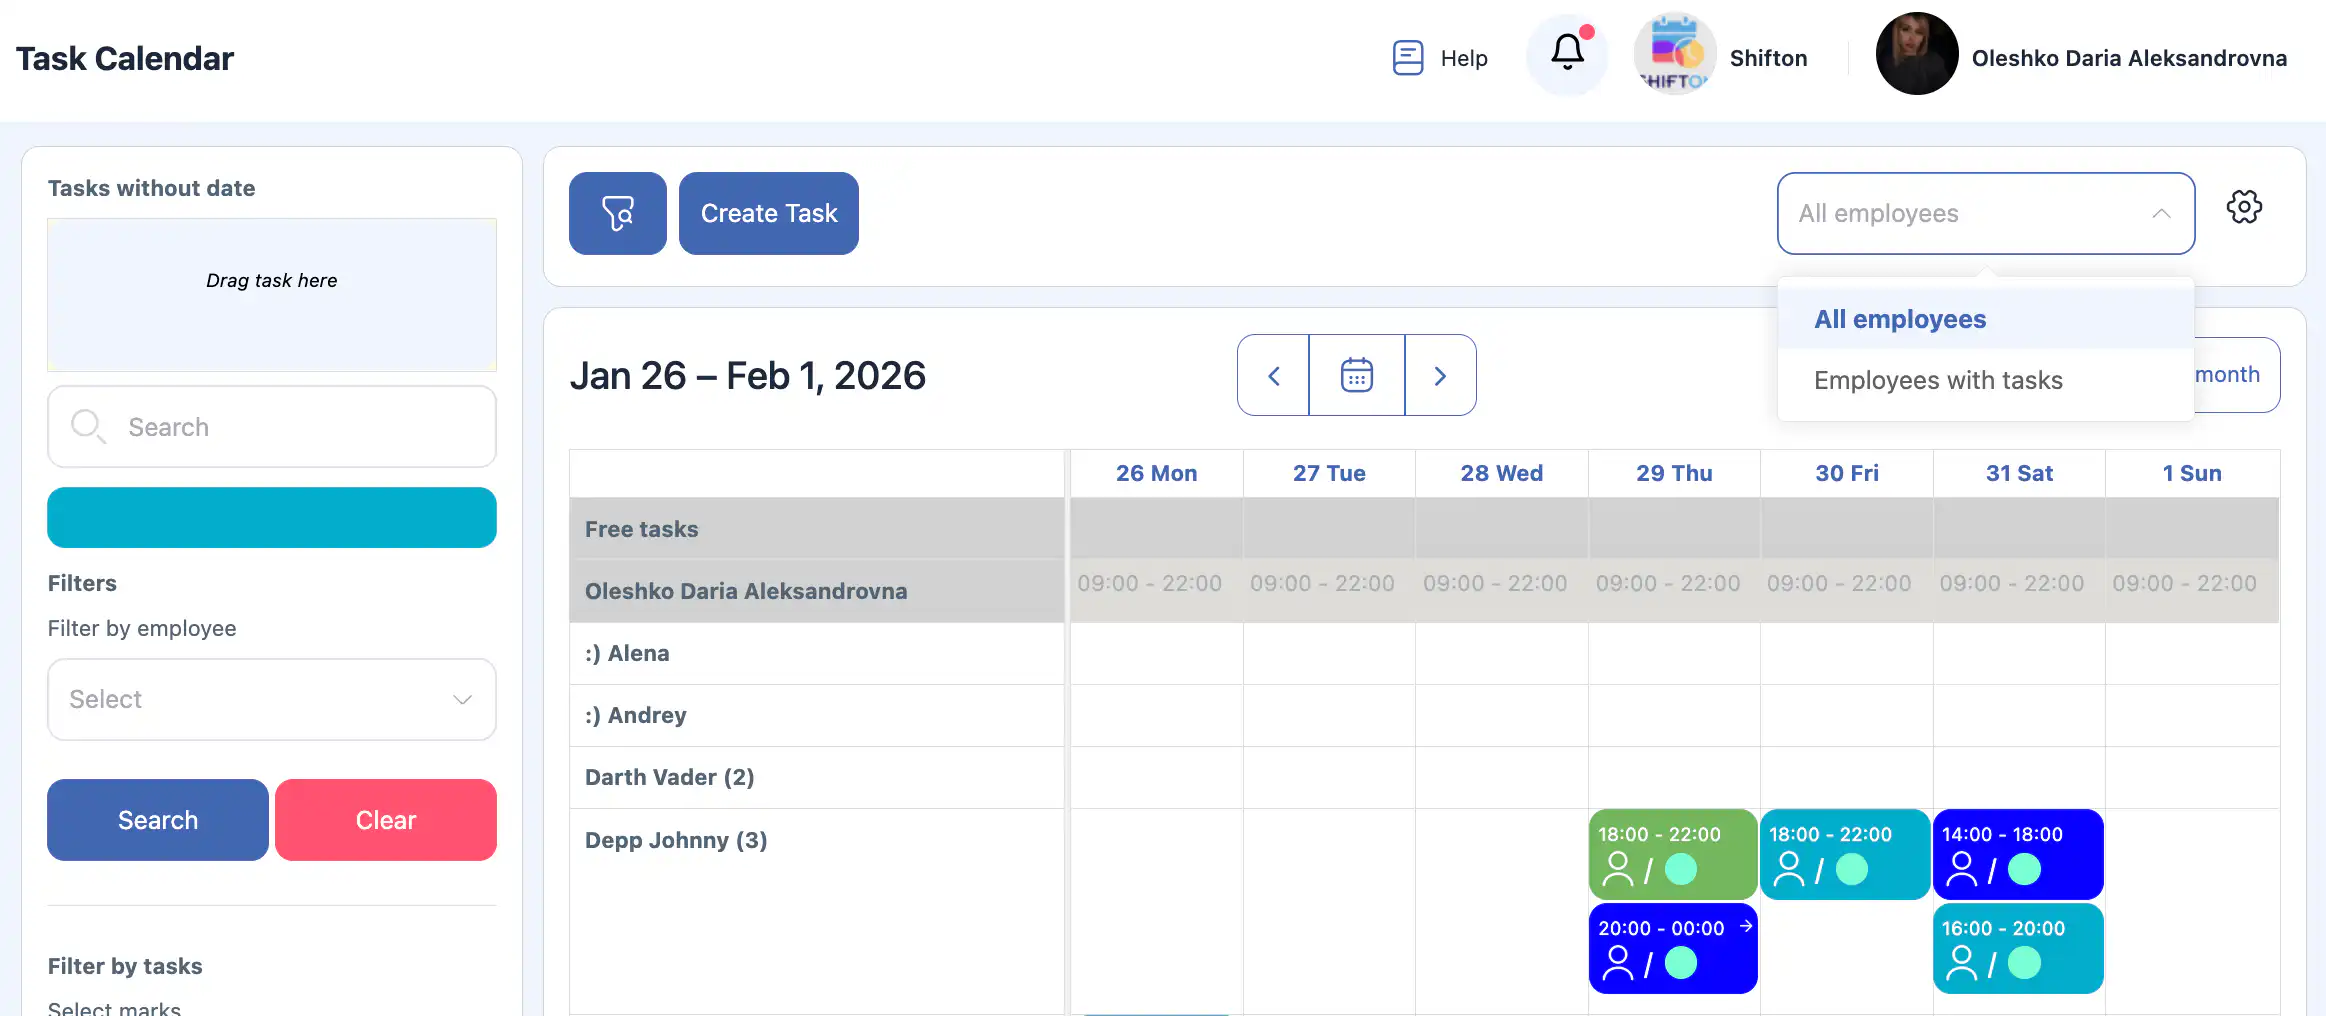
3. Calendar Page
The Calendar provides a visual overview of tasks.
-
Tasks assigned to employees appear as cells on the employee row.
-
Tasks with a date but without an assigned employee appear in the unassigned task list.
-
Tasks without a scheduled date appear on the side under Tasks without Date.
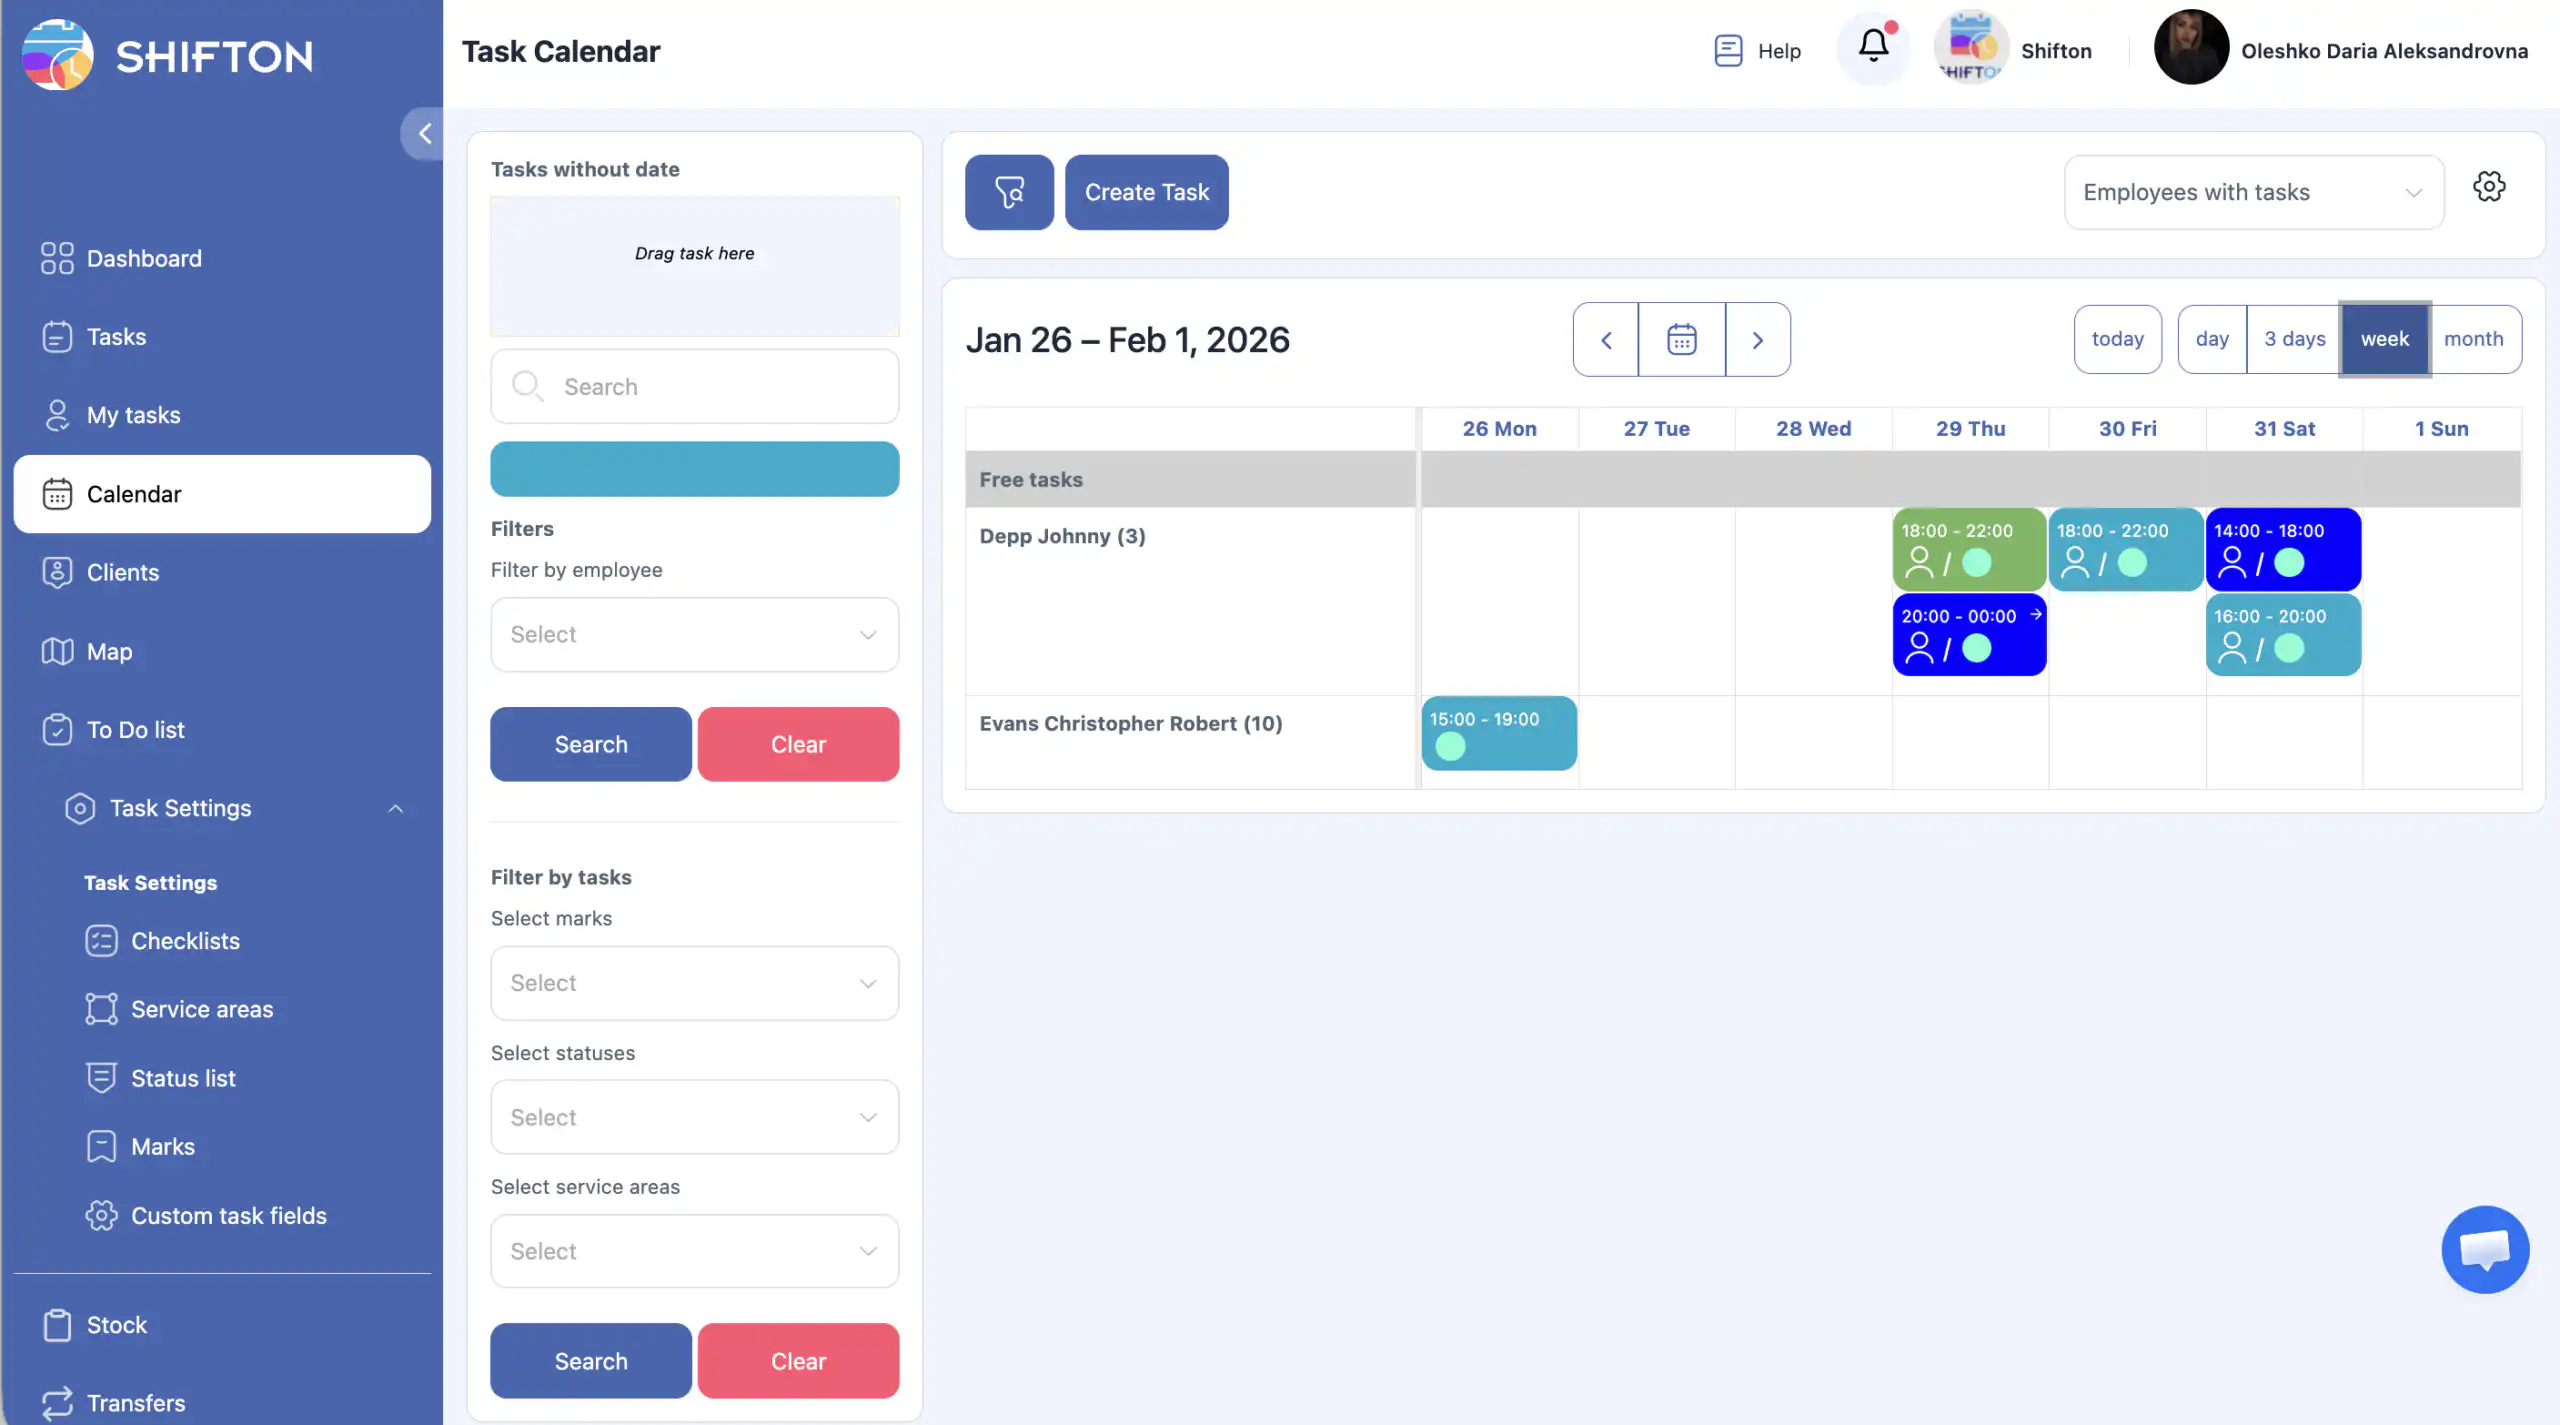
Calendar filters:
-
Filter by employee
-
Filter by task type
-
Select marks
-
Select statuses
-
Select service areas
Applying filters: Click Search. To reset filters, click Clear.
To improve the calendar view, hide the filter panel by clicking the filter icon above the calendar.
Calendar display options:
-
Display tasks for all employees or only employees with assigned tasks.
-
Display options: 1 day, 3 days, 1 week, 1 month.
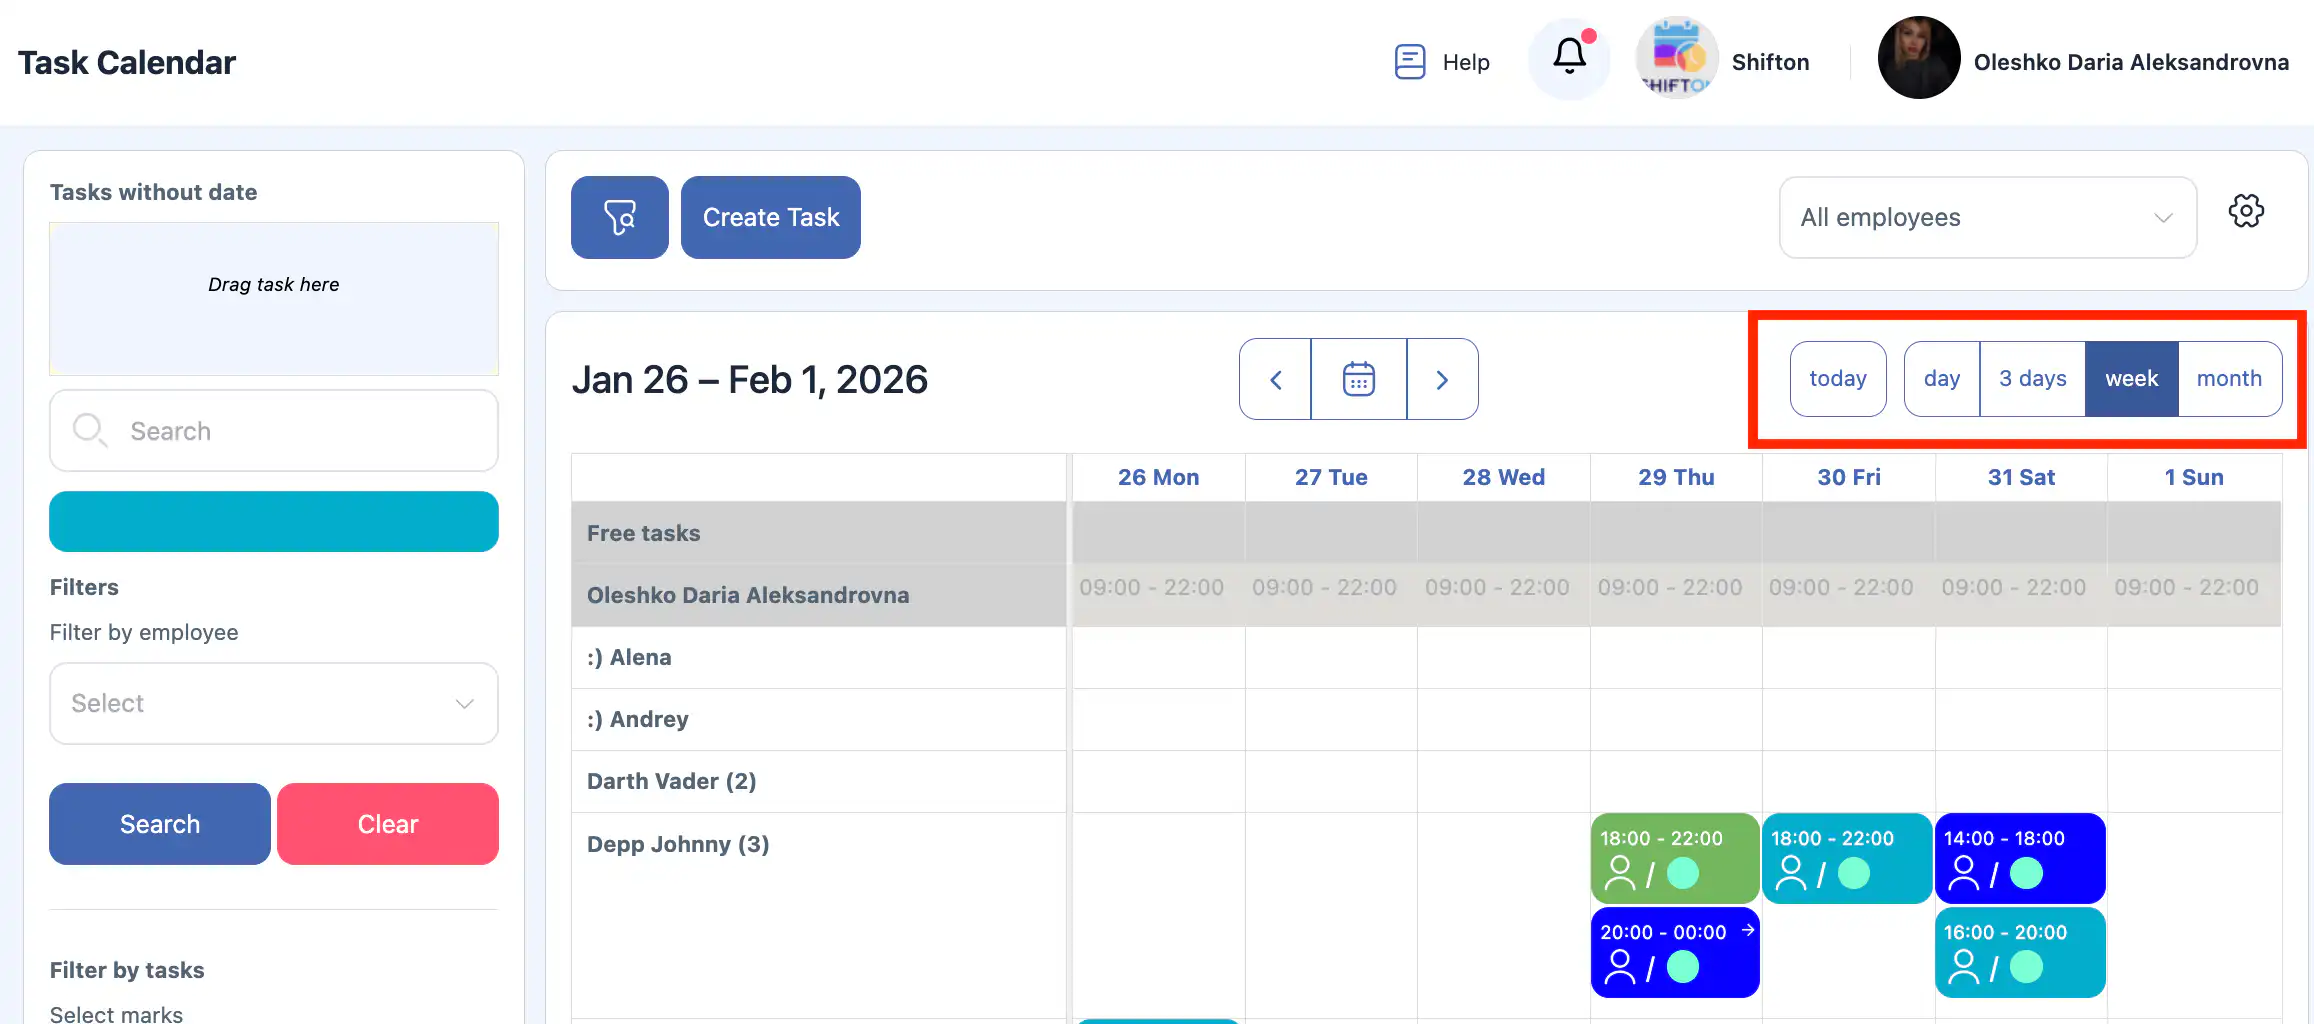
-
Navigate days or months using the left/right arrows or select a specific day via the calendar icon.
-
Click the gear icon for additional settings:
-
Display tasks – controls task visibility in 1-day view.
-
Display mode (day) – display only working hours (e.g., 8:00–17:00).
-
Sorting options for employees – choose to display employee numbers.
-
Sort – by name or personal number.
-
Tip: Adjust these settings for clarity when managing many tasks simultaneously.
Creating a Task
Click Create Task to start a new task.
1. Client (Optional)
-
Select an existing client or create a new one.
-
To select, type at least 3 letters of the client name to search.
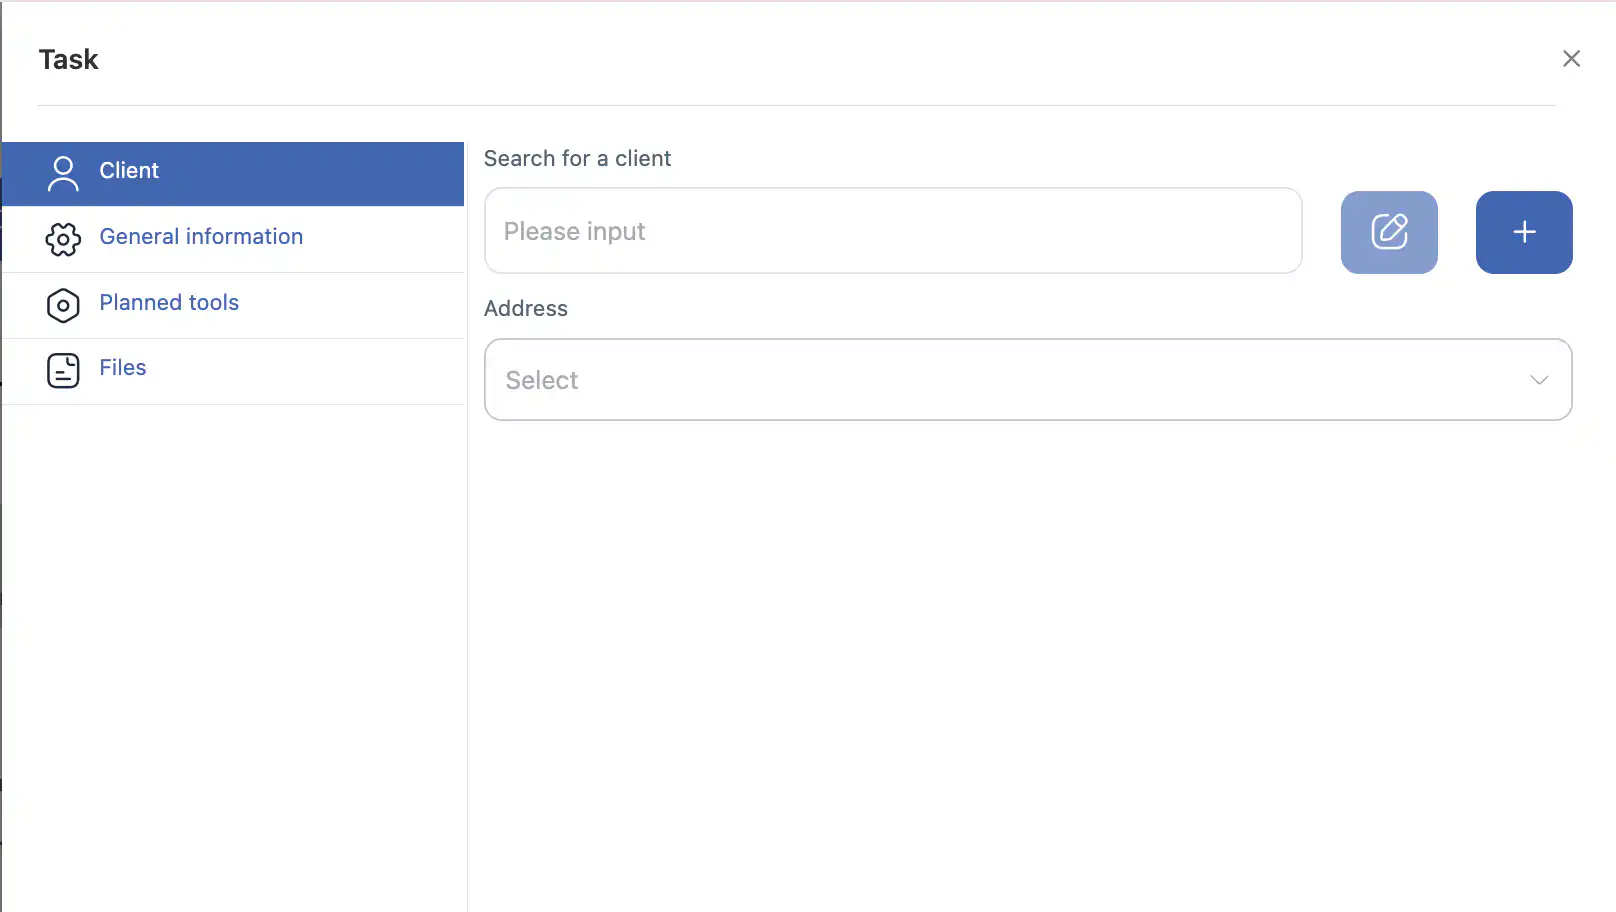
-
Choose the correct address.

-
To edit client details, click the pencil icon → make changes → Save.
-
To create a new client, click the + icon → fill in required fields → Save.
Note: Always verify client and address selection. Incorrect addresses lead to task errors.
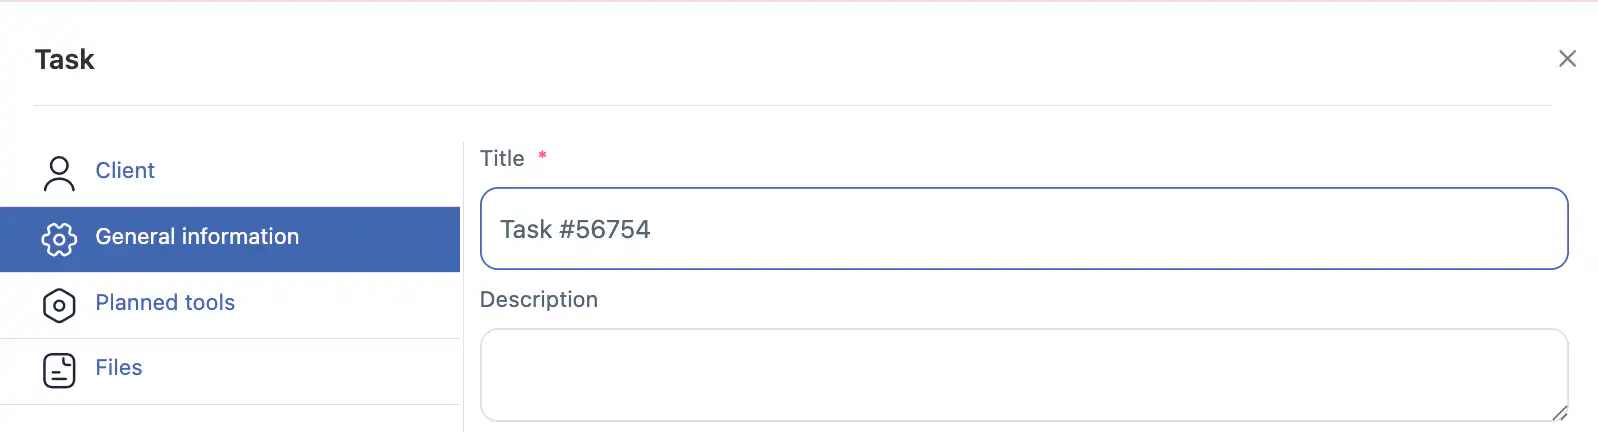
2. General Information
-
Fill in general information fields (custom or standard fields your company has configured).
-
Scheduled time – start time of the task. If left empty, the task appears in Tasks without Date.
-
Estimated duration – time required to complete the task, used for planning and avoiding overlaps.

-
Marks – visual markers for task types on the calendar.
-
Skill – select pre-defined skills to filter employees during assignment.

-
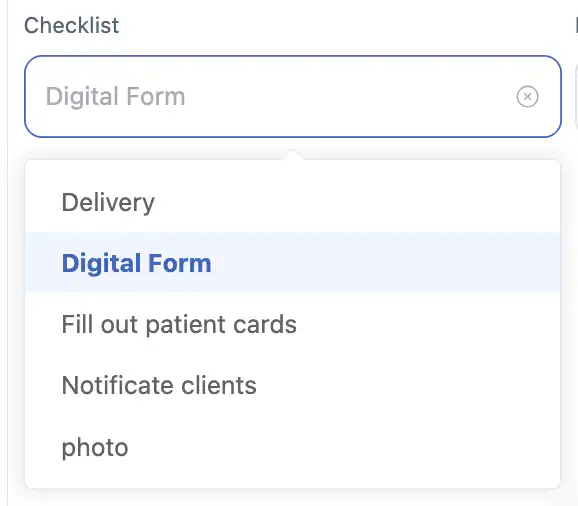
Checklist – choose a checklist for the employee to complete during the task.
Tip: Properly setting marks, skills, and checklists ensures correct employee assignment and task completion tracking.
3. Employees
-
Tasks can be assigned to one or multiple employees.
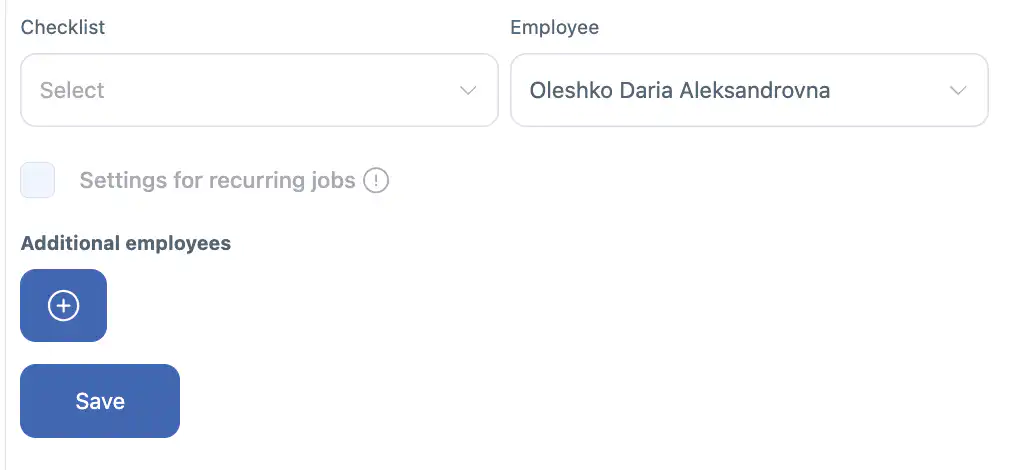
-
After selecting the first employee, the Additional Employee field appears.
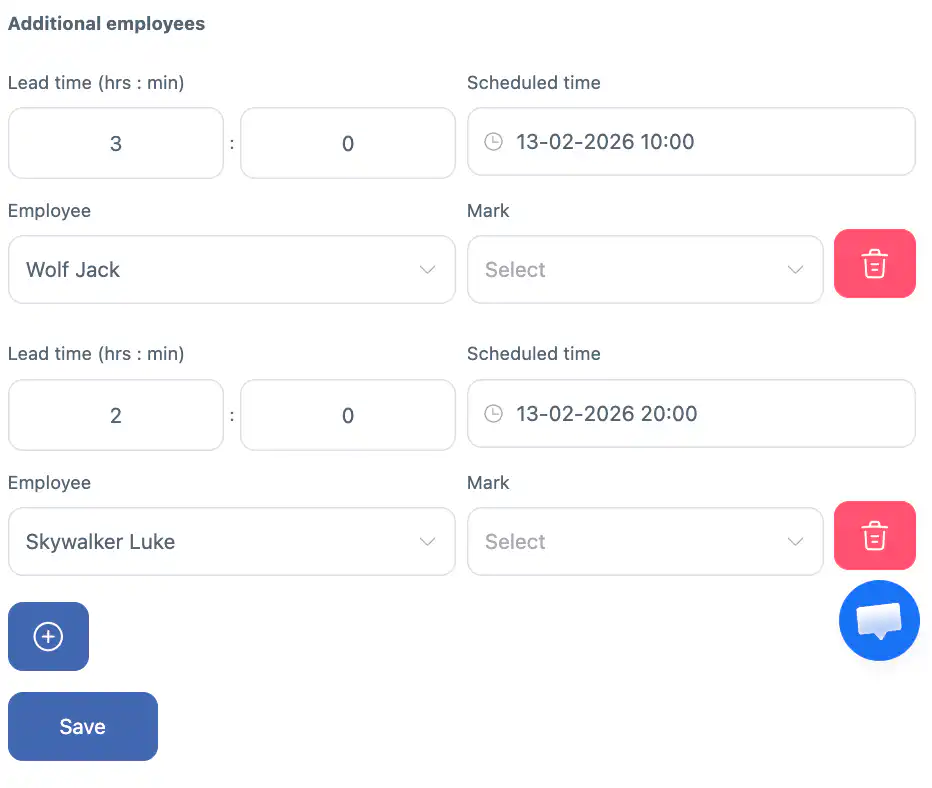
-
Each additional employee receives a subtask. Subtasks can have:
-
Separate scheduled start time
-
Separate estimated duration
-
-
To remove additional employees, click the trash icon next to them.
Example: For catering events, decorators arrive first, waiters arrive 2 hours later, cleaning staff in the evening. Subtasks allow precise scheduling.
4. Recurring Tasks
-
Recurring tasks are available only for a task assigned to a single employee.
-
Enable via Recurring Jobs Settings checkbox after setting the scheduled time.
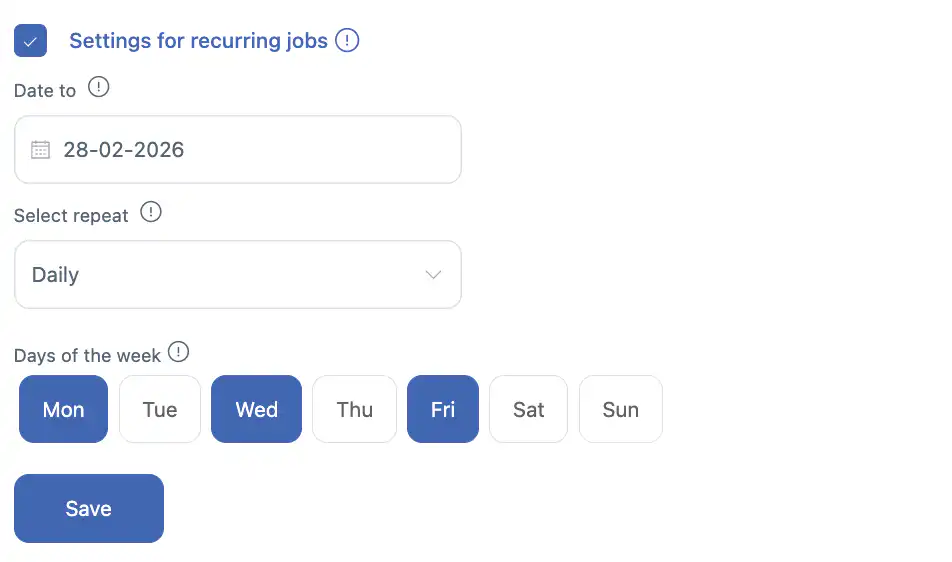
-
Choose end date and type of recurrence:
-
Daily – select weekdays (Monday–Sunday).
-
Weekly – same weekday every week until end date.
-
Every 2 Weeks – same weekday every 14 days until end date.
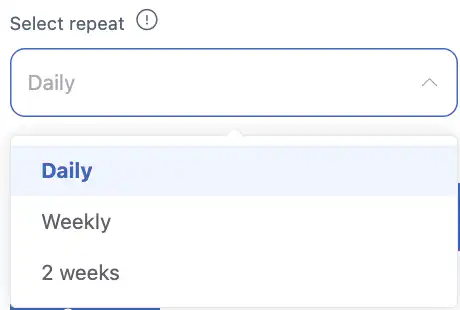
-
Note: Adding additional employees disables recurrence for the extra employees.
Important: Before task execution begins, you can edit this task or all future occurrences, including: employee, checklist, date/time, marks, skills, etc.
5. Planned Tools (Optional)
-
Specify necessary tools, equipment, or consumables for task completion (requires Inventory module).
-
Tools must be available in the correct quantity for the employee.
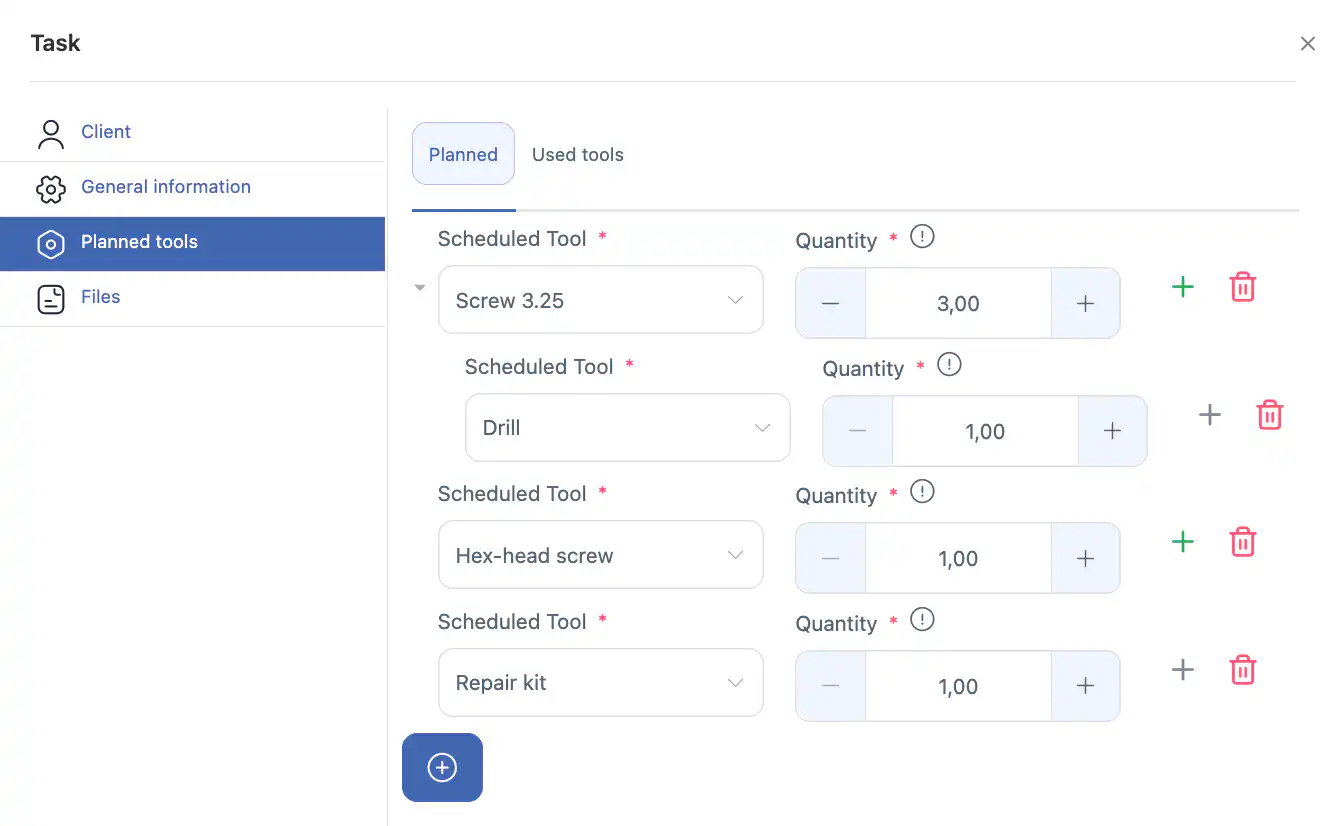
-
Note: Planned tools may differ from actually used tools in type or quantity.
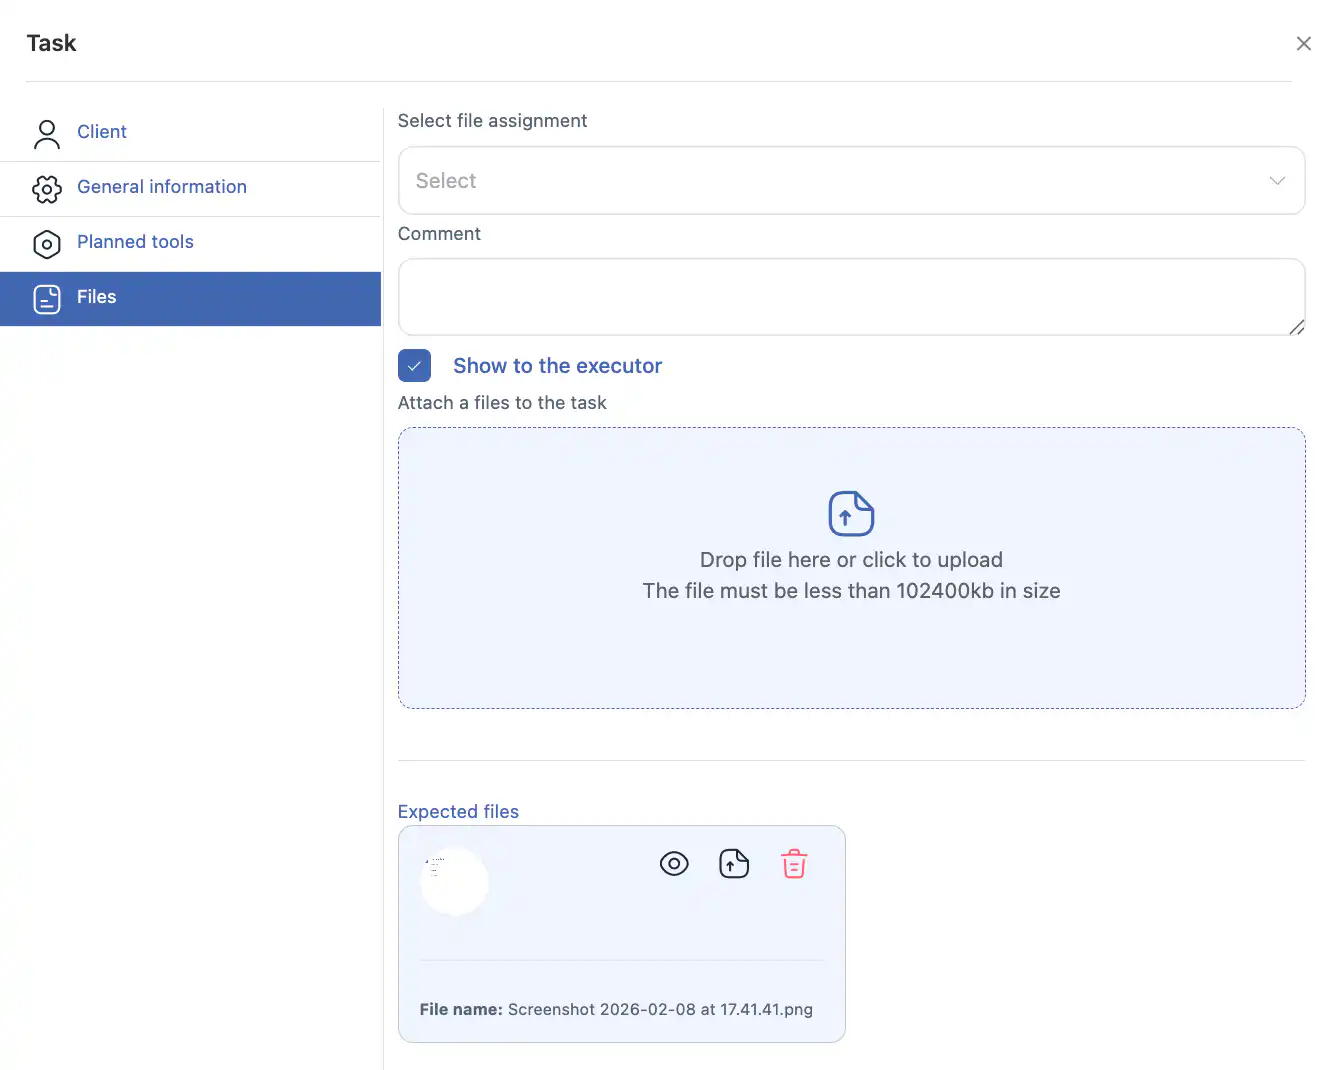
6. Files
-
Upload client photos or documents.
-
Choose whether to show or hide files from the employee.
FAQ – Creating and Assigning Tasks
1. Why can’t I select a client address?
A client has multiple addresses; one must be selected to assign the task correctly.
2. What if the client does not exist?
Use the + icon to create a new client and fill in required fields.
3. Can I create a task without a client?
Yes, the client field is optional. Tasks without a client appear in lists and on the calendar.
4. Why isn’t my task showing on the calendar?
Tasks without scheduled time appear in Tasks without Date. Add a scheduled time to display on the calendar.
5. How do I assign multiple employees?
Select first employee → Additional Employee field appears → add more employees → subtasks are created.
6. Can recurring tasks be assigned to multiple employees?
No, recurrence is available only for a single employee.
7. What are subtasks?
Subtasks are for additional employees with separate start time, duration, and checklist.
8. What do orange and green circles mean?
-
Orange circle – non-recurring
-
Green circle with checkmark – recurring
9. Can I edit checklists after task creation?
Yes, before task execution. Subtasks can have separate checklists.
10. Why doesn’t keyword search find my task?
Search only works on fields enabled for search.
11. How do I display tasks on the map?
After filtering and sorting on the Tasks page, click display on map.
12. Can I see tasks for all employees on the calendar?
Yes, display all employees or only those with assigned tasks.
13. How do I filter tasks by marks or types?
Use filters → click Search.
14. How do I change the scheduled time for a subtask?
Each subtask can have its own start time and duration.
15. What happens if I delete the main employee?
Main task is deleted. Subtasks may lose linkage. Delete subtasks first if needed.
16. How do I set a recurring task?
Select start date → check Recurring Jobs Settings → set end date and type.
17. Can recurring tasks start on different days for different employees?
No. Recurrence is linked to one employee and start date. Before execution, you can edit this or all future tasks.
18. Why don’t planned tools match actual usage?
Planned tools are recommendations; actual usage may differ.
19. How do I attach files?
Upload files → choose whether to show/hide them from the employee.
20. How do I edit client info after task creation?
Click pencil icon → edit → Save.
21. How do I specify estimated duration?
Use Estimated duration field to plan and avoid overlaps.
22. How can I view completed tasks?
Filter by Completed; completion time appears in the Completed column.
23. Can multiple employees have different checklists and times?
Yes, via subtasks.
24. What if a task isn’t visible after calendar filtering?
Check all filters. Tasks without scheduled time appear in Tasks without Date.
25. How do I schedule multiple employees on the same day?
Use subtasks with different start times and durations.
26. Can I edit recurring tasks after creation?
Yes, before execution, any field can be edited: employee, checklist, date/time, marks, skills.
27. Can a task have multiple checklists?
Yes, subtasks can have different checklists.
28. What happens if I don’t set a scheduled time?
Task appears in Tasks without Date and is not shown on a specific day in the calendar.